Purchasing a new shower enclosure is the first step on the road to a gorgeous new bathroom or ensuite. In this expert step-by-step guide, we'll show you how to fit a new shower enclosure, to achieve a high quality finish.
Before we begin, we must stress that installing a bathroom should be carried out by a professional tradesperson with experience in this type of work. Whilst attempting it yourself may seem like a good way to save money on your bathroom installation cost, we would recommend leaving it to an expert. This guide is merely intended to demonstrate how a shower enclosure is fitted.
Click on any of the links below to jump to a relevant section.
- What is a shower enclosure?
- Tools you’ll need
- How much will a tradesperson typically charge?
- Fitting your shower tray without a riser kit
- Fitting your shower tray with a riser kit
- Fitting your shower enclosure
- Shop showers
- More shower advice
What is a shower enclosure?
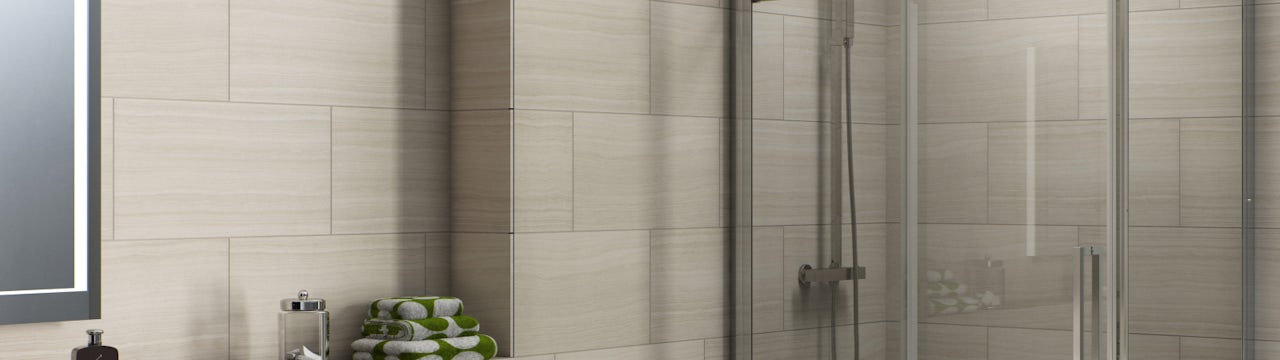
A shower enclosure is a standalone cubicle, usually with one or two doors for access, which contains your shower. It is designed to channel waste water into the waste outlet pipe and keep water from splashing out into your bathroom. Shower enclosures usually have a shower tray on which the enclosure rests (unless you have a wet room). Some of the best bathrooms tend to feature a frameless, walk in design, that really opens up the space.

Walk in shower enclosures are becoming increasingly common in contemporary bathrooms
At Victoria Plum, you'll find a huge range of shower enclosures, varying in style, shape and design, including the following:
- Quadrant, square, rectangular or d shaped shower enclosure
- Walk in shower enclosures
- Wet-room glass panels
- Shower cabins
- Shower enclosure with tray
Before you do anything
Always unpack and inspect your shower enclosure immediately after delivery. Check for any damage or faults as it’s better to find them now, rather than during installation.
Always turn off your water at the mains before attempting any DIY in the bathroom.
Tools you’ll need:
- Adjustable wrench (acrylic shower trays only)
- Bucket (stone shower trays only)
- Claw hammer
- Electric drill
- Hack saw
- Jigsaw (stone shower trays only)
- Sealant gun
- Spirit level
- Standard screwdrivers
- Tape measure
- Wood chisels
Check you have the following:
- Glass panel(s)
- Frames (also known as channels)
- Door(s)
- Door handle(s)
- Fixings
- Shower tray
- Shower tray waste
- Building sand (when fitting without a riser kit)
- Cement (when fitting without a riser kit)
- PVA glue (when fitting without a riser kit)
- Shower and/or valve
- Shower door seal strips (if applicable)
- Silicone sealant
Time to complete:
- 1 day
How much will a tradesperson typically charge?
£510–£540 (price may vary—find out more about bathroom fitting costs)
Fitting your shower tray without a riser kit
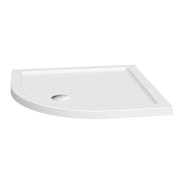
At Victoria Plum, you’ll find our stone shower trays are crafted from high quality, WRAS (Water Regulations Approval Scheme) approved materials and include a stone resin core capped in an excellent impact and scratch-resistant ABS acrylic material for superb durability. We also stock a wide range of acrylic shower trays, that offer a great value option for bathrooms and ensuites.
The following instructions are for fitting your shower tray without a riser kit. If you have a stone resin shower tray with riser kit, please see instructions further down the page.
Here is how to fit a shower tray
Step 1
Place your shower tray where you want it positioned and draw around the edges with a pencil onto the floor. Make sure you also mark the position of the trap below the waste hole on your tray.
Step 2
Cut a hole in the floor using your jigsaw big enough to fit the shower trap. This will flow into the waste outlet pipe.
Step 3
Cut an access hatch into the floor next to the tray. You will need this to gain access to the space beneath the tray once it has been secured in place. Make sure you can comfortably get your arm into the hatch and access the waste outlet pipe and trap.
Handy hint: Make the hatch a permanent feature (just in case you need to access the trap in future) by screwing in place strips of wood beneath its edges. This will fix the flooring you cut out in position once you replace it.
Step 4
Attach the waste to the tray using the instructions supplied (see video below), ensuring rubber gaskets are fitted to each side of the waste opening making it completely watertight.
Step 5
Use a diluted PVA solution (one part water to five parts PVA) and spread this onto the area upon which your tray will rest, giving it time to dry.
Step 6
Mix some mortar to a firm consistency in a bucket (using four parts building sand to one part cement). Apply a thin layer to the tray area (around 25mm-30mm in depth).
Step 7
Place the tray on top of the mortar and let it rest into position. Check that it’s level from different angles using your spirit level. If required, you may need to even out the mortar to ensure a level finish.
Step 8
Smooth the mortar around the edges of the tray and allow to dry for 24 hours.
Step 9
Whilst it’s drying, you can reach into the access hatch and connect the trap to the waste and the waste outlet pipe. Make sure there aren’t any leaks.
Step 10
Seal around the edges of the tray using silicone sealant and your sealant gun.
Step 11
Replace the lid on your access hatch.
You’re now ready to move on to fitting the shower enclosure itself.

Our stone shower trays are made from stone resin and capped with acrylic for durability
Want to know how to fit a shower tray waste? Watch this video:
Fitting your stone resin shower tray with a riser kit
A stone resin shower tray is easy to fit if you use a riser kit, which supports the tray above the level of your floor. Please see this video for step-by-step instructions.
The following instructions are for fitting your stone resin shower tray with a riser kit. If you have an acrylic shower tray, or simply don't want to use a riser kit, please see the instructions above.
Here is how to fit a stone resin shower tray with a riser kit
Step 1
Lay the shower tray in position and mark the outline and waste hole.
Step 2
Move the tray to one side and drill the holes for the fixing brackets into the floor. Make sure to use the necessary safety equipment.
Step 3
Fit the brackets, leaving a 2mm gap for the edge of the riser panel.
Step 4
Install the shower tray waste now.
Step 5
Put together the leg assemblies as shown in the instructions.
Step 6
Remove one side of the adhesive pad and fix to your leg assembly. Repeat this for the remaining legs and place all assemblies in the correct positions but don’t affix them at this point.
Step 7
Fix the panel brackets to the outer edges, leaving a 5mm gap at the edge for the connecting Velcro strip.
Step 8
Clean surfaces of debris and fix the leg assemblies in place using the adhesive strips.
Step 9
With all of the leg assemblies fixed in place, set each leg to 96mm from the shower tray.
Step 10
Flip the shower tray over carefully and connect to the waste pipe.
Step 11
Remove all of the protective film.
Step 12
Place the tray in position and check that it’s level, adjusting the legs if necessary.
Step 13
Measure the length of the panel needed and cut to size.
Step 14
Remove the protective film from the panel.
Step 15
Fix the Velcro strips to the panel brackets.
Step 16
Fit the panel to the tray and cap the joints with the supplied covers.
You’re now ready to move on to fitting the shower enclosure itself (see below).
Fitting your shower enclosure
As mentioned above, there is a wide range of shapes and sizes available when it comes to shower enclosures.
The following instructions are for fitting a square shower enclosure into the corner of a room (the most common position), where you will only require one side panel and door panel (the other two sides being made up by the walls of your bathroom). However, the same principles can be applied to other shower enclosures.
You may need a second person to help you with this part.
Here is how to fit a shower enclosure
Step 1
Start with the channels that will fix your panels to the wall. Using your spirit level to ensure they’re vertical, place the channels at the corner edges of your tray.
Step 2
Using your electric drill, drill pilot holes in the wall. Insert rawl plugs and screw the channels to the wall.
Step 3
At this point, you need to know which side your door will be on. Once you have decided, take the side panel which will remain permanently in place and slot it into the appropriate channel.
Step 4
Fit the door panel into the other channel.
Handy hint: This is definitely the time to call on a friend or loved one to help.
Step 5
Both panels will now be positioned on the outside edges of your tray. You will need to fix them together at the corner, following the instructions supplied.
Step 6
Using your screwdriver, screw the panels into position using the fixings supplied.
Step 7
Fit the handle to your door.
Step 8
Seal around the outer edges of the enclosure using silicone sealant and your sealant gun. Don’t seal the inside edges.
Congratulations, you’ve now fitted your shower enclosure.
Whilst DIY can be a good way to save time and money, you should always hire a qualified professional to plumb and install your products. The instructions above are simply a guide to fitting your new shower enclosure and shouldn’t be used to attempt full plumbing and installation.
Shop showers
You've now got your fancy new shower enclosure, so why not check out our comprehensive range of high quality showers and complete the job?

More shower advice
At Victoria Plum, you'll discover lots of expert advice on showers and enclosures. Simply click on any of the links below to find out more.