Want to bring that personal touch to your bathroom? We explain how to build your own floating vanity unit.
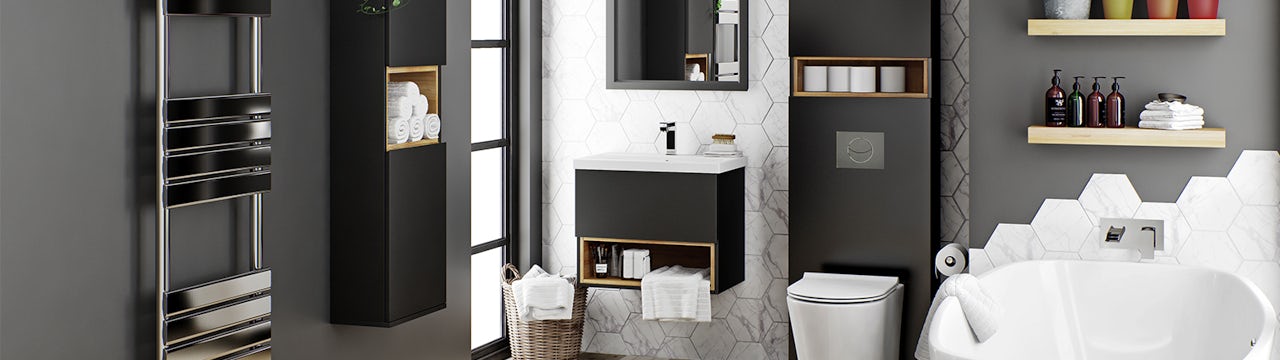
Many of us wish to upgrade our bathrooms but are always put off by the potentially hefty prices of bathroom decoration. Whether you want to enhance the whole space or just tweak the style, one of the main items to choose is a vanity cabinet. This is because it can give a range of bathrooms a modern and clean appearance, as well as providing ample storage space through deep drawers, with choices for double basins.
Despite the high prices we often get when trying to replace our vanity cabinet, you can opt to build one yourself with the correct tools. This is a simple way to improve your bathroom space.
Here, we give you free access to a set of simple woodworking plans that will walk you through the steps to building your very own floating bathroom vanity cabinet. The most important thing is to take the skills mentioned within this guide so that you can choose to adapt this build to your bathroom needs with different styles.
After attempting this, you should be able to tackle many other projects with confidence. The range of transferable skills can work in bathrooms as well as other rooms in your home with alternative furniture. Vanity units create a good focal point, but the building skills can be used for other pieces—either carefully cut to size or pre-assembled.

Do your research
There are quite a few things that you will need to get started. Focus on the small space and bathroom size initially to work out your measurements. You may decide the bathroom needs more space so this will affect the basin or wall hung choices. Smaller bathrooms may need maximum floor space and larger rooms could have 2 basins.
Equipment such as a mitre saw, for quick cutting, and a router for hollowing out the wood will be essential in your floating vanity unit build as they will do most of the leg work for you. Also, you could opt for using big clamps to keep the structure of your bathroom vanity intact while you secure it together.
You will need to prepare some hardwood and plywood for building materials, as well as some finishing equipment like glue, stains or paint and sandpaper.
The sizes of your building materials are dependent on the size that you want your cabinet to be, so make sure you have a ruler and pencil on hand to measure things out. You may need to drill holes or use items such as a sharp blade in order to execute your chosen vanity unit design.
The drawer
A good way to start is by building the internal components of the vanity cabinet—otherwise known as the drawers.
To craft any drawers, you will need to prepare the wood so that it can be assembled into a box shape. Cut it down to size accordingly, making sure that the drawer fits perfectly.
Next, you want to use a dovetail jig—a specialised device which helps to make dovetail joints faster and more accurately than by hand. This forms the tails at the ends of the wood pieces that make up a vanity unit. Follow the instructions provided with the jig to do this and ensure that they are all equally spaced and sized.
To ensure that everything is a good fit, assemble the pieces of the bathroom vanity without glue, first of all, to make sure they are all secure and perpendicular and that the dovetails are snug against each other. Then mark out with a pencil where the grooves will be for the drawer base.
Putting the drawers together
Cut out the grooves for the drawer bottom that you marked out earlier. Do this carefully and slowly to prevent having to redo the drawer of the vanity unit. Plan twice, cut once.
Draft out with a pencil to mark how big you require the vanity drawer bottom to be on the wood base, and then cut it down to size for a sturdy fit. At this point, it is recommended that you not only sand down the drawer bottom but also the side pieces of the vanity as well. This will get rid of any cut marks and achieve a smooth, even surface.
To secure all the pieces of the vanity unit together for your bathroom, put a small amount of glue on the pins that attach to the tails, using a spare thin piece of wood or a brush. Make sure that the glue is spread evenly on all the contact points of the joints. This will ensure rigidity. Use a mallet to knock all the pieces in place if it is difficult to slide into each other.
When putting the vanity unit drawer bottom into the grooves, ensure that no glue is used. Prepare the door panels by cutting them down to size and then joining the edges using a jointer, which will be cut out by a plate joiner. You can then place some glue into the slots and assemble the entire frame of the bathroom vanity, making sure to apply an even force with your clamps whilst the glue dries.

Building the cabinet frame
You should build the bathroom vanity base by cutting all the wood to the sizes you want for your back, front and sides. Connect the pieces using finishing nails or a pneumatic finish nailer, as glue will not be required for these joints. They should then be pressed firmly.
For the side panels, it is a good idea to use plywood to create 2 cabinet sides and 2 shelves of the same size. Alongside this, you need a length of plywood for the face of the cabinet, plus a few pieces that will act as a support for the vanity structure. These can created using a jigsaw and a layout square. At this stage, you can also use glued-up hardwood panels on your plywood to better fit your bathroom look..
Before assembling any vanity units in your bathroom, cut grooves onto the interior back edges of the 2 cabinet sides to be able to fit in the back pieces. This can be done with a table saw and a piece of wood.
Place it all together, starting from the sides to the bathroom vanity base, followed by the bottom shelf to the plywood base. You should ensure that it fits flush with the sides. These pieces can all be secured by using nails to ensure that it retains their rigidity.
You can attach the rear piece into the grooves using glue and nails—do the same with the top-back strut. Finally, the front face bathroom vanity piece will be placed into the middle of the top front corners of the 2 sides and secured using finishing nails.
For the vanity doors and drawer front, cut out the correct size you need from your door panel glue-ups and wood, and sand them all down first with a machine. Follow this with hand sanding to add detail.
Small bathrooms require more expert project advice as you will want to make maximum impact in your room. The style, wall and floor will flow freely together in the bathroom and will work nicely with vanity units and task lighting. Installing storage is hugely important—this can be used to keep cleaning products safe.

Putting it together
At this stage, stain or paint your bathroom vanity according to the fit and finish that you want. Make sure that you fill all of the nail holes with wood putty or filler and sand off when dry to get a smooth, even surface. Ensure that you put whatever finishing coat you want on all surfaces of the cabinet so that it is unaffected by humidity in the bathroom.
Following on from this, check that the drawers can fit and slide smoothly within the bathroom vanity after fitting the drawer slides. Attach the 2 door panels to the build with hinges. Finish it all off with chic handles and fix them in a comfortable and reachable place.
Vanity units can add a decorative appeal to your space, especially if you are replacing an old basin with a new stylish sink in your bathroom. Installing something to suit your space and floor is a crucial point with vanity units. Countertop basins will enhance the look of your bathroom.
Mounting
Grab some snap toggles or spring toggles. This is a heavy duty plasterboard and cavity wall anchor. Mark out the area of the wall where you intend to place it, using measurements taken from the mounting holes and brackets on your vanity cabinet. Then, drill into the wall and create the cavities for your mount, making sure to increase the size of the drill bit until you achieve the size that is needed for your mounts. The holes should be level.
Align the mounting holes of the cabinet to the holes on the wall in the bathroom and then push the toggles through both holes. Tighten down the screws of the toggles until they are securely fastened.

Conclusion
And there we have it. You’ve finished the vanity cabinet of your dreams. The joy of building things, creating a look and actually using it for its intended purpose will bring you a great deal of joy and satisfaction. You have even saved a fair bit of money doing it yourself as DIY is often less of an expense. Vanity units will truly enhance the look of your space and add storage at the same time.
With many different ways to customise and design your cabinet and bathroom, don’t be afraid to add your flair and unique design to your vanity cabinets to make your bathroom truly one-of-a-kind.
Shop bathroom vanity units
You’ll find a huge range of bathroom vanity units, all at the lowest prices around, right here at Victoria Plum. Browse our full selection by clicking on the image below.


