Tiles are a great way to keep the more functional spaces in your home, like bathrooms and kitchens, clean and tidy. In this in-depth guide, we’ll show you how to tile and save money.
When used on walls and floors, tiles provide an excellent low-maintenance wall covering that looks stylish and works brilliantly well with the rest of your décor. Many people employ a tradesperson to carry out their tiling for them, however, with some guidance and a little bit of confidence, it is something you can do yourself, saving you money on tile installation costs.
Complete with videos and links to all our other in-depth tiling guides, our how to tile guide is the perfect place to start. To help you find exactly what you need in this how to tile guide, simply click on any of the links below to jump to a relevant section.
- How to choose the right tiles
- How to work out how many tiles you need
- How to choose your adhesive and grout
- Which tools you'll need
- How to cut tiles
- How to fix wall tiles
- How to fix floor tiles
- How to fix glass tiles
- How to fix mosaic tiles
- Using tiles with underfloor heating
- Using large format tiles
- Tiling wet rooms and shower areas
- Shop tiles
Choosing the right tiles
Ceramic tiles
One of the most popular types you can buy, ceramic tiles are commonly found in homes up and down the UK. They aren't quite as dense as porcelain meaning they are suitable for indoor use and can come in a matt, satin or gloss finish.
Porcelain tiles
Beautiful and highly durable, porcelain tiles are great, long-lasting choice for kitchen and bathroom walls and floors. They can be used both indoors and outdoors.
Mosaic tiles
Made up of small pieces of ceramic, stone or even glass, mosaic tiles are usually supplied on a sheet, so they can be easily cut to the shape and size you desire, for use in borders and feature walls.
Glass tiles
This is a great material for creating funky designs around splashbacks and for creating borders or feature walls. As glass is a more delicate material, they cannot be used on floors and real care must be taken when cutting them.
Working out how many tiles you need
Before you start learning how to tile, the big question you'll need to ask is, how many tiles will I need?
To find out, simply use our online tile calculator (which you will find on every one of our tile pages) or, if you prefer the old-fashioned method, measure your room and use this rough calculation:
Length x width of your room in metres = Area in square metres
Of course, this calculation is a rough guide for a square or rectangular room. If you have an irregular shaped room, divide it into smaller squares or rectangles and calculate separately.
It's always better to buy slightly more tiles than you need, to allow for breakages or miscalculations that may occur. Around a 10-15% allowance should be factored into this. This also means that you should be buying from the same batch. If you end up buying from separate batches, there may be slight variations in colour and finish.
For further information, see our in-depth guide to help you work out how many tiles you need.
Choosing your adhesive and grout
There is a bewildering array of grouts and adhesives on the market, so you need to make sure you choose the right one for your job.
Grouts
Available in a wide variety of colours, with white being the most common, grouts are used to fill in the gaps between your tiles, providing a seal against water and dirt.
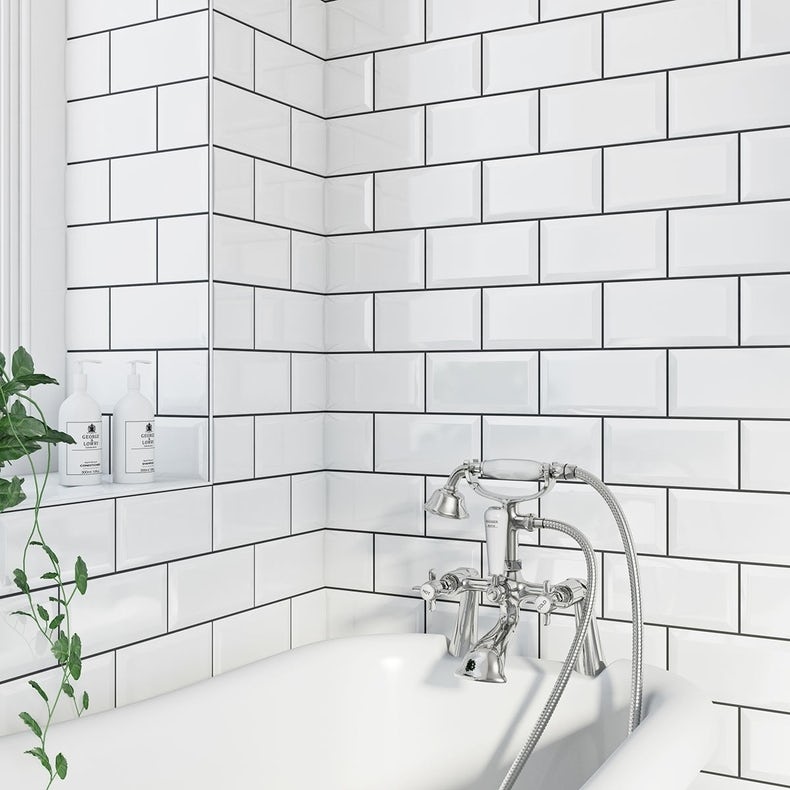
When choosing, look out for colours that either complement or contrast with your tile colour. A contrasting grout works particularly well where you'd like to emphasise the pattern of the tiles e.g. with metro tiles.
Contrasting black grout goes really well with white metro tiles
The general rule of thumb here is, the wider the joints between your tiles, the thicker the grout you require.
You can buy grout as ready mixed or powdered. Ready mixed is quick and easy to apply and usually supplied in sq metre quantities, but powdered can be a better option, as you simply add water to mix to your desired consistency
Once you have chosen ready mixed or powdered, you can also choose these specific types:
- Waterproof or anti-mould grout—ideal for bathrooms or kitchens where the tiles will be exposed to high moisture content.
- Flexible grout—should be used where movement or vibrations are likely (e.g. beneath a washing machine). Features excellent joint filling capacity.
Check out our step-by-step guide on grouting and working out how much you need.
Adhesives
Another thing you’ll need to consider before learning how to tile is your adhesive. Used to actually stick your tiles to the wall or floor, there are a range of adhesives available for your needs.
The general rule of thumb, is that the bigger and heavier the tile, the thicker the adhesive required.
Just like grout, ready mixed can be an easier option, but powdered grout allows you to achieve your desired consistency.
Once you have chosen ready mixed or powdered, you can also choose these specific types for the type of tiling you're looking to do:
- Standard set tile adhesive—with the look and feel of cement, it is the most common adhesive and can be used where the setting time is not an issue.
- Epoxy based adhesive—this is a mixture of synthetic and organic ingredients, that are blended together to initiate a quicker setting period.
- High grab acrylic wall tile adhesive—should be used when fixing larger, heavier tiles to your wall. With non-porous tiles, like porcelain and glass, standard set is recommended, or your setting time will be substantially increased.
- Highly flexible acrylic wall tile adhesive—ready mixed and water-resistant, suitable for indoor use on areas of wall which receive a large amount of water (e.g. showers)
- Rapid set flexible tile adhesive—a high strength, premium adhesive, where a strong bond and quick setting time are essential. Suitable for laying over underfloor heating.
- Rapid set tile adhesive—for quicker setting times
- Ready mixed acrylic wall tile adhesive—ideal for most indoor uses.
At Victoria Plum, all our grouts and adhesives are supplied by Evo-Stik, one of the leading UK adhesives brands, so you can be assured of a top quality product.
Question: How thick can I lay floor tile adhesive?
Answer: The thickness of your floor tile adhesive depends on the type of adhesive you have chosen and the type of floor you are fixing your tiles to (e.g. concrete or floorboards). You will be able to find the recommended thickness on your tile adhesive packaging.
For answers to questions like these and more, see our full guide to mixing and applying tile adhesive, where we also show you how to calculate the amount you'll need.
You'll need the following tools:
- Spirit level
- Measuring tape
- 50mm x 25mm wooden batten (for marking out tiles)
- Tile cutter (see video below on how to use this)
- Tile nipper (for nipping edges)
- Tile adhesive trowel
- Grout float (also known as a "grouting squeegee")
- Tiling sponge
- Tile spacers (can be 2mm, 3mm or 5mm)
- Tile markers or a pencil
- Mechanical tile cutter (for harder tiles, such as porcelain, glass or stone)
- Tile trim (for edges, available in plastic or metal)
- Bath seal
How to cut tiles
When learning how to tile, you will need to know how to cut tiles, which can be a delicate and often time-consuming business. However, when done well, the results can be incredibly satisfying. Head to our in-depth guide for full instructions on how to cut tiles or watch our video below which shows you how to use a flatbed tile cutter.
How to fix wall tiles
Stage 1. Preparation for wall tiling
- Backer board - ensure any new backing board is installed correctly and to the manufacturer's instructions.
- Prime any new plaster with acrylic primer—this is vital, as unprimed plaster can draw moisture away from adhesive, causing issues with the bond.
- Plasterboard can be used for walls, as long as it is supported and is at least 12.5mm thick. Fix tiles directly onto the paper facing.
- Painted surfaces—check the state of any painted surfaces beforehand. Remove old wall coverings and flaky paint. Fill in cracks and ensure the surface is smooth, clean and blemish-free.
See our in-depth guide on preparing walls for tiling.
Stage 2. Tiling your wall
-
Take a long length of timber and mark the tile widths. This will help you identify where each tile will start and finish. Leave space for your joints which should be at least 2mm.
-
Mark out the horizontal position of your tiles, especially around windows, where the same size cuts can be made either side. Avoid, small and difficult cuts where possible.
-
Locate the lowest point on your wall, where the tiles will begin. This may be the top of a skirting board, top of a bath, work surface, etc.
-
Place one of your tiles against the lowest point and draw a line along the top of it.
-
Nail your wooden batten, so the line is at the top edge. Make sure it's level, using your spirit level. The first row of tiles will rest on the batten.
-
Draw a vertical line down the centre of the wall, so you can check that the tiles are lined up vertically. You should start tiling from this central position outwards.
-
Spread your wall tile adhesive onto the wall using your notched trowel, working in small areas, a metre at a time. This will ensure the adhesive doesn't form a skin before you attach your tiles.
Handy hint: If you're tiling in an awkward spot, apply the adhesive to the back of the tile instead.
-
Starting at the lowest and most central point, press the tile into the adhesive and twist into place.
-
Repeat outwards along the first row, before moving upwards to the next row, using spacers (if necessary) to ensure a consistent joint.
Handy hint: Cross-shaped spacers can be used to ensure a uniform joint where 4 tiles meet.
-
Check with both the horizontal and vertical joints with your spirit level every few rows, to ensure your tiling remains uniform.
-
Remove any excess adhesive from joints and remove your spacers before moving onto grouting.
Handy hint: If your tiles don't have a glazed edge, you can achieve a tidy finish with tile trim, which can be added whilst you fix your tiles. Also, when tiling around areas such as baths, basins and showers, make sure you use silicone sealant between joins, to prevent water getting in.
Stage 3. Grouting
Find out how to grout and how much grout you'll need in our expert guide, complete with video and step-by-step instructions.
Allow at least 24 hours between fixing and grouting your tiles, unless using rapid setting adhesive. This will let the adhesive dry properly, forming a strong bond between tile and surface.
-
Using your grouting squeegee, force the grout into the joints between the tiles. Don't use any type of rigid spreader, as this could scratch your tiles.
-
Wipe off any surplus grout using a sponge.
-
To finish off, polish the whole surface with a dry cloth.
Congratulations! You have now tiled your wall.
Learning how to tile is one of the best things you'll ever do—a beautifully tiled wall will look stylish for years to come
How to fix floor tiles
Stage 1. Preparation for floor tiling
- Make sure your tiles are suitable for use on floors
- Remove fixtures—remember, laying tiles will increase the level of your floor, so remove any fixtures beforehand
- Check how flat your floor is. If there are any uneven spaces, a levelling compound can be used
- Mark a chalk line down the centre of the room, parallel to a suitable wall—this can commonly be done by approaching the room from the doorway
- Lay your tiles along this line and work outwards towards a suitable wall, leaving joints of at least 3mm between each one
Stage 2. Tiling your floor
-
Mix your adhesive in accordance with the manufacturer's instructions.
-
Working in small areas of about 1 sq. metre, spread your adhesive onto the floor using a notched trowel. This should result in a ribbed adhesive bed on which you will lay your tiles.
-
Spread adhesive onto the back of your tile in a thin layer before pushing and twisting the tile into place on the bed of ribbed adhesive. This should ensure there are no gaps beneath the tile.
Handy hint: Cross-shaped spacers can be used to ensure a uniform joint where 4 tiles meet.
-
Remove any surplus adhesive from your tiles using a damp sponge, and remove any spacers you have used.
-
Using your spirit level, make regular checks to ensure your tiles are flat and level. If any tiles are uneven, remove or apply adhesive to level it out. Make sure you do this before the adhesive sets.
Stage 3. Grouting
Allow at least 24 hours between fixing and grouting your tiles, unless using rapid setting adhesive. Also, make sure you don't walk on them during this period. This will let the adhesive dry properly, forming a strong bond between tile and surface.
-
Using your grouting squeegee, force the grout into the joints between the tiles. Don't use any type of rigid spreader, as this could scratch your tiles.
-
Wipe off any surplus grout using a sponge.
-
To finish off, polish the whole surface with a dry cloth.
Congratulations! You have now tiled your floor.
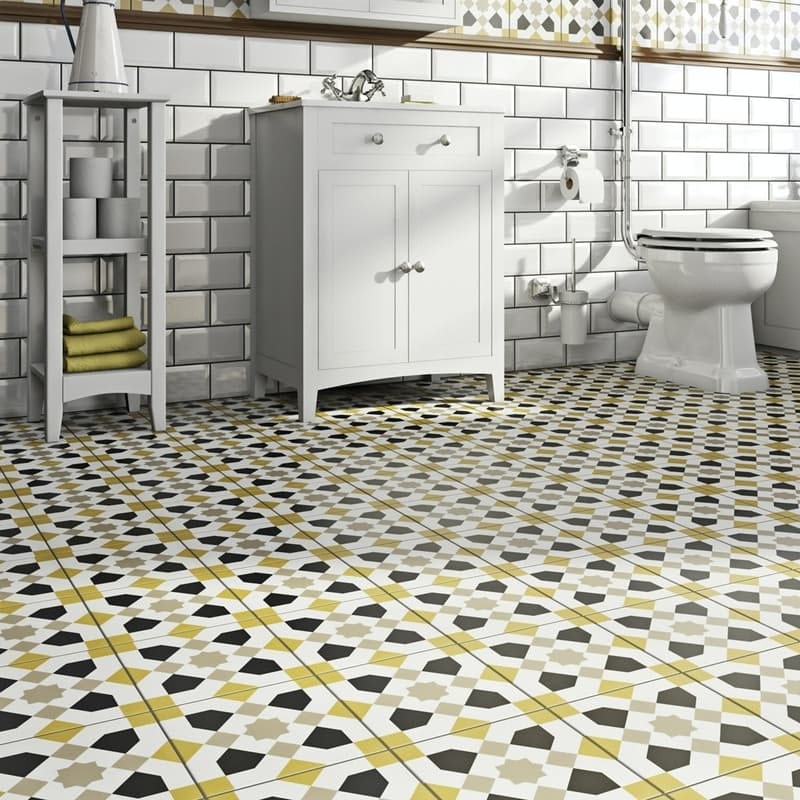
Give your floors an interesting and unique style with feature tiles
Special tips for floor tiling
If you are tiling onto a timber floor, it's a good idea to use a water-based polymer admixture, which allows for flexibility as your floorboards expand and contract.
When tiling in bathrooms, special attention must be made to the gap between the wall and floor. Use a flexible antibacterial sealant.
Grit is new flooring's worst enemy, as it scratches and dulls new tiles. Try placing a mat adjacent to any external doors.
When tiling on new concrete, ensure it is at least 6 weeks old and thoroughly dry, smooth, flat and dirt free.
How to fix glass tiles
Glass tiles look superb and are typically used as borders, splashbacks and feature walls, rather than whole walls. However, due to their more fragile nature, they aren't suitable for use on floors.
The preparation and fixing for glass tiles is just the same as your usual tiles. The place where tiling differs is at the cutting stage.
Glass tiles can be cut using a diamond wheel wet cutter, which is designed for specific use with glass tiles. Make sure you wear protective goggles when cutting. The edges, once cut, can be very sharp and should be positioned into the corners where possible.
To smooth down the edges, use some coarse wet and dry sandpaper, but be careful not to damage the surface area of the tile.
How to fix mosaic tiles
Mosaic tiles, much like glass tiles, are used to create interesting borders or feature walls. Rather than a single tile, mosaics are usually supplied on a flexible mesh sheet, so you can trim them down to size.
Preparation and fixing are exactly the same as regular tiles.
As well as borders and splashbacks, mosaic tiles can be used to create a feature walls and floors
Using tiles with underfloor heating
- Always install your underfloor heating to the manufacturer's instructions
- Don't switch on your underfloor heating for at least 21 days after tiling your floor. If tiling onto an existing underfloor heating, make sure it's turned off for at least 3 days beforehand, and 21 days afterwards. This will allow the adhesive to set naturally
- Movement joints will be required around the perimeter of the floor, and in larger rooms, may be required at intervals. In this instance, it is worth seeking professional advice
See our full guide on choosing the best flooring for underfloor heating.
Using large format tiles
- Any tile over 300mm x 300mm in size, requires a completely flat surface
- It is essential that you use the correct adhesive, with 100% coverage of each tile
- It is recommended you add adhesive to the back of your tiles as well as the surface
- They may not be suitable to fix in a brick bond style
Tiling wet rooms & shower areas
Where water will land directly onto the tile, it is essential that you tile onto a water-resistant surface, such as a waterproof backing board.
At Victoria Plum, we stock a comprehensive range of wet room solutions. For further information, see our post on waterproofing your bathroom.
Shop tiles
Now you’ve learned how to tile, it’s time to choose the perfect tiles for your bathroom or kitchen. Discover a huge range of beautiful tiles at Victoria Plum by clicking on the image below. Don’t forget, you can also order free cut samples before you buy.


