Is your bathroom looking old and outdated with grubby grout and tired tiles? Well, here’s an easy switch that’ll have it feeling fresh and fancy in next to no time.
As part of our range of Easy Switches blog posts, we’ll be looking at the more simple things you can do to transform your bathroom. In this article, we’ll show you how easy it is to spruce up your bathroom space with shower wall panels.

Shower wall panels vs. tiles
When choosing your bathroom wall coverings, there are several options you could choose. However, in splash zones, like the internal walls of your shower enclosure, the area above your bath and the space behind your basin, you will need a more watertight solution that offers better protection.
Many people opt for tiles, as they offer a very hardwearing surface that is impervious to water. However, these days, many more people are choosing shower wall panels which can also be used right around your bathroom.
The benefits of shower wall panels vs. tiles are clear to see:
- Quick and easy installation—can be fitted up to 6 times faster than tiles, with no need for a specialist tiler.
- Cost-effective—many shower wall panels cost less per square metre than tiles
- 100% watertight with no need for grout
- Easy to clean—a simple wipe with a cloth is all that's needed
- Can be fitted over existing wall coverings like tiles—no need to remove your old tiles first
- Limitless stylish design options (which we'll explore below)
- Lengthy guarantees—for added peace of mind

Preparing for your shower wall panels
Measure your walls
Whether you are simply updating the internal walls of your shower enclosure or working right around your bathroom, you’ll need to know how much space you’ll need to cover. Check out our guide on how to measure your bathroom.
Choosing your shower wall panels
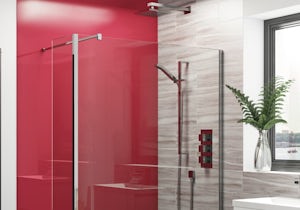
From a stylistic point of view, there are hundreds of colours and designs you can choose from to achieve your desired look. At Victoria Plum, we stock a huge range of shower wall panels. Here’s a guide to our selection:
Orchard Bathrooms shower wall panels
Made from 10mm rigid PVC, the shower wall panels from Orchard Bathrooms come in a range of simple yet stylish designs, including gloss white and marble-effect. Ensure you purchase your Orchard installation kit and profiles for a professional installation.

A simple and cost-effective alternative to tiles, Multipanel’s unique Hydrolock edge produces a tight, almost invisible join for seamless, watertight walls. Manufactured using Forest Stewardship Council-certified materials, you’ll find an exceptional selection of colours, styles and designs, including the popular Linda Barker range.

Brand new to our range, Kinewall offer a wide selection of stunning designs for your bathroom walls, including tile and wood effects, plus beautiful botanical prints. Made in Europe from quality aluminium composite, Kinewall wall panels are customisable to fit any wall size and shape. Plus, enjoy complete peace of mind with a 10 year manufacturer's guarantee.

Prior to installation
Once you’ve picked your shower wall panels and ordered them, they will be carefully delivered by experienced couriers.
Prior to installation, it is strongly recommended that you condition your panels, by laying them down flat in the bathroom in which they will be fitted (or a similar environment) for a period of between 48–72 hours. Don’t rest them at an angle against walls, or between supporting structures.
How to fit shower wall panels
In this guide, we’re using Orchard Bathrooms wall panels and installation kit. Installation instructions may vary slightly depending on which brand and design you choose. So, always consult the instruction manual when installing your product.
The installation kit should include fitting guide, dual-purpose clear adhesive sealant, a roll of foam tape, sanding pad, tile spacers and a silicone finishing tool.
You will also need:
- Caulking gun
- Safety goggles
- Tape measure
- Sharp blade
- Electric or fine tooth saw
Watch the video below and follow the step-by-step instructions.
Here’s how to fit shower wall panels in your bathroom
-
Measure the area where the wall panels will be fitted. This includes both horizontally and vertically. Wall panels can be fitted over multiple surfaces, like tiles and plasterboard.
-
Take your panel and lay it flat on supports with the front facing up, then mark out the cutting lines on the panel. Strips of masking tape will help protect the edges while cutting the panels down to the required size.
-
Using the electric saw, carefully remove the excess wall panel. Remember, to use the safety goggles when using these tools. We’ll be using the chrome trims to give a nice clean finish to our edges. So, we are removing the tongue and groove join from both sides of the panel. Some trims may have to be screwed in using a screwdriver or power drill.
-
Take a sanding pad and run this along all the cut edges. This will create a smooth finish and remove any debris. Now, flip the panel over and use the sanding pad to rough up the surface. This will allow the sealant to form a stronger bond.
-
To fit the panels together, we are using the corner trim piece. Add a small bead of sealant to the wall and place the corner piece into position. Place tile spacers underneath the location of the wall panel. This will allow for sealant to be added afterwards. We are now ready to apply the sealant to the rear side of the wall.
-
Begin by laying 3 parallel strips of foam tape along the entire length of the board. Then apply the sealant, first with a thin line down either side, then zig-zag the top and bottom for greater coverage. Finish with large circles of sealant, to make sure it’s spread evenly.
-
Now we’re going to fit the end trim piece to the board. Add some sealant to the inside of the trim, as well as the very edge of the wall panel. Then position the trim in place. After adding some sealant to the corner trim piece, remove the backing layer from the foam tape.
-
Lift the panel into position and slide into the corner piece at an angle. This prevents the tape from sticking to the wall until the panel is in the correct position.
-
Repeat the process with the remaining wall panels, again ensuring they are correctly positioned before smoothing down firmly. If you want a less visible join, you can make use of the tongue and groove joins. By adding some masking tape here, we can keep a nice, neat finish when applying the sealant.
-
Slide into place and remove the tape. Finish the join by running the silicone finishing tool along the groove.
-
Use the same technique when sealing the panels to the floor. A little sealant and you’re done.
Enjoy your new bathroom look
Wall panels are a quick and easy alternative to tiles. Add in some fantastic Victoria Plum products and your bathroom makeover is complete.
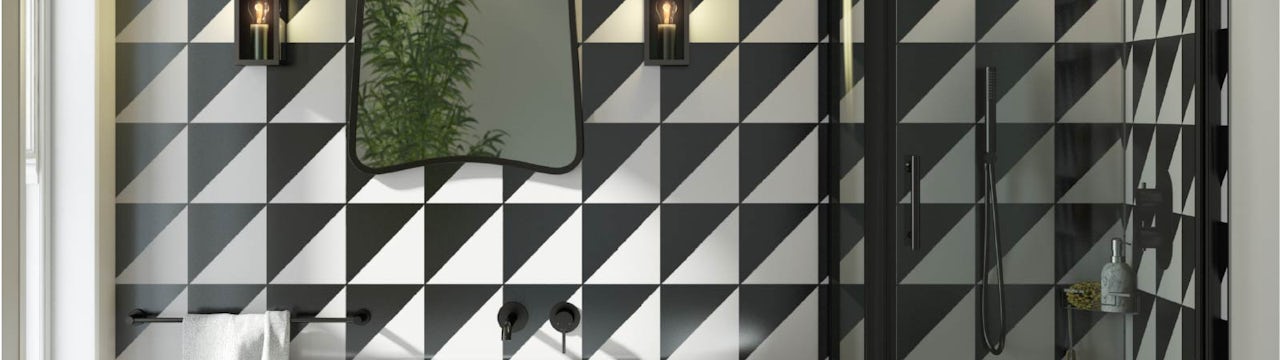
If you need further inspiration, check out more wall panel styles on our site, like the one pictured below.

Shop shower wall panels
Why not browse our wide range of shower wall panels from brands such as Orchard Bathrooms and Multipanel.

Discover more Easy Switches
If you’re looking for more quick and easy ways to update your bathroom, take a look at our Switches and Fixes hub for ideas and advice.