Replacing your old toilet seat is quick and easy. In the latest of our Switches and Fixes articles with video, we'll show you how to fit a toilet seat.
According to a recent bathroom survey we conducted, nearly half of those interviewed stated that they had a "loose or broken toilet seat that hadn't been fixed". It certainly shouldn't be this way, as our step-by-step guide will demonstrate. Fitting a new toilet seat is really easy and can give your bathroom that little lift it deserves.
In this guide, from the bathroom experts at Victoria Plum, we’ll explain why toilet seats need replacing and demonstrate exactly how to do it with step-by-step instructions and an instructional video. We’ll even explain more about specific toilet seat types and shapes, and show you which other easy DIY tasks you can complete in your bathroom.
If you’d like to skip to a relevant topic, simply click on any of the links below:
- Why should you replace a toilet seat?
- Which toilet seat is right for me?
- Tools you’ll need to install a toilet seat
- Instructional video
- Step-by-step instructions on how to change a toilet seat
- Safety considerations
- Shop toilet seats
- More DIY Quick Fixes for your bathroom
Why should you replace a toilet seat?
Toilet seats, by their very nature, endure plenty of wear and tear. If you think about it, the average toilet seat is opened and closed many times a day. Multiply that across months and years and you can see why it’s one of those items which need replacing the most.
If your current toilet seat is loose, rattly, cracked or if the soft close hinge is no longer working, it is, at the very least, annoying, and in a worst case scenario, potentially dangerous. Therefore, for the sake of a small outlay, it is always best to replace a toilet seat as soon as possible.
Which toilet seat is right for my toilet?
Before replacing your toilet seat, you’ll need to know which one is right for your toilet. Sadly, toilet seats aren’t universal, which means you’ll need to do a spot of measuring before placing your order.
The measurements you’ll need are:
- Length—Measure from the holes in your toilet to the very front edge of your toilet
- Width—Measure the diameter from edge to edge
- Height—Measure the distance between the holes to the cistern or wall
- Between holes—Measure the distance between the centre of each fixing hole
We show you how in this short video:
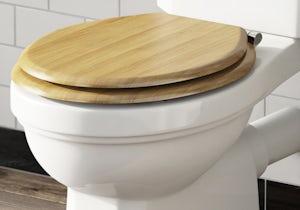
UK toilet seats broadly come in 3 distinct shapes:
- Round
- D shaped
- Square
Check out the image below to help you identify which toilet seat shape you will need.

When it comes to materials, toilet seats are generally available in either wood or plastic. Wood is great for those who wish to create a more traditional look and feel, while plastic is hardwearing and cost-effective. One other choice you may wish to make is between conventional and soft close hinges. As the name might imply, soft close toilet seats help reduce general wear and tear, prevent excessive noise and minimise the (all-too-painful!) risk of trapped fingers.
If you wish to find out more about toilet seats, why not read these informative articles?
Tools you’ll need to replace or fit a toilet seat
- None required for the seat used in this video (although with some seats you may require a set of screwdrivers)
You’ll also need:
- Cloth and household cleaner to wipe the area
- Disinfectant cleaner
- Rubber gloves
Step-by-step video showing how to install a toilet seat
Here’s how to replace or fit a toilet seat
- Please refer to the instructions with your product.

- Check the box and make sure you have all of the required fixings.

- Remove the old seat by unscrewing it and lifting away from the toilet. If there are caps covering the screws, you may need to remove these using a screwdriver. Most seats are fixed at the rear of the pan like this.

- Take out the old fixings and clean the area using disinfectant.

- Install the seal kit onto the new seat and select the corresponding holes which will fit your pan.

- Test the position of the seat. If you are happy, fasten the seat onto the pan using the nuts provided.

Congratulations, you have now fitted your toilet seat.
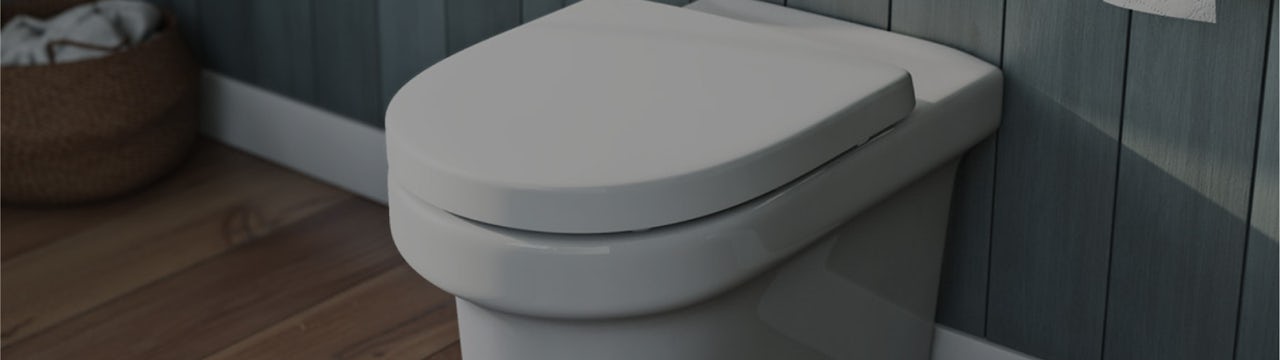
The toilet seat used in the images and video above is The Bath Co. traditional white engineered wood toilet seat with top fixing soft close hinge and the toilet is The Bath Co. Dulwich close coupled toilet with soft close wooden toilet seat white.
Safety considerations when replacing a toilet seat
Toilets are a potential breeding ground for harmful bacteria and germs, so you do need to be careful when replacing a toilet seat.
It is a good idea to first clean your toilet, using bleach and a toilet brush, and wear rubber gloves throughout the cleaning process and when fitting your toilet seat.
Spray all areas (especially those parts which are covered by toilet seat hinges) with disinfectant, once you have removed the old toilet seat.
Shop toilet seats
Browse our huge range of high quality toilet seats. Simply click below to begin browsing.

More Quick Fixes for your bathroom
For quick and easy bathroom DIY jobs which you can do yourself, head to our Switches and Fixes page. Or, alternatively, click on any of the links below:
- 30 quick bathroom fixes you can do yourself
- How to clean a shower head
- How to clean a shower screen
- How to clean a tap cartridge
- How to bleed a radiator
And, if you ever wondered whether you should leave a toilet seat up or down, we’ve come up with the definitive answer, that will end the debate once and for all!