Fitting a kitchen? If you’re confident and experienced when it comes to DIY, you may wish to cut your own worktops to size. In this guide, we’ll show you the best way to approach this.
Before we begin, we would strongly recommend hiring an experienced and recommended tradesperson to install any kitchen worktops. Using their years of expertise, they will ensure your worktops are cut and fitted correctly. However, if you feel this is a task you can take on yourself, we’ll explain exactly which tools you’ll need, how to measure and, ultimately, how to cut kitchen worktops to size.
- Tools you will need
- Step-by-step guide
- How to measure a kitchen worktop
- Cutting a kitchen worktop FAQs
- Helpful tips
- Further advice
- Shop kitchens
Tools you will need
- Dust mask
- Masking tape
- Measuring tape
- Notepad and pencil
- Safety goggles
- Saw (circular or router saw are recommended)

What is the best way to cut a kitchen worktop?
As mentioned above, the best way to cut a kitchen worktop is to hire an experienced professional. However, if you feel you’d like to do yourself, follow the steps below.
Step 1—Measure
Assuming you’ve purchased uncut lengths of laminate worktop, the first thing you’ll need to do is take measurements, so you know exactly how large each section of worktop needs to be.
As the old saying goes: “Measure twice, cut once”, although we’d highly recommend measuring, re-measuring and then measuring a third time, to ensure your kitchen worktops fit perfectly.
Mark out the required cuts with your pencil, including any sections you may need to cut out, like those for sinks or hobs. Also, allow for any uneven walls, especially in older properties.
Handy hint: There will undoubtedly be “off cuts” (small sections of worktop which will simply go to waste). Once you have marked these out, you can use them to practice your cuts before you attempt the real thing.
Step 2—Select your saw
When it comes to making the actual cuts, there are several tools you can choose from. Some people like to do it the old-fashioned way, with a handsaw. And many swear by this, as it can help prevent chipping. However, it is very labour-intensive and doesn’t always produce the straight lines that other tools can achieve. Plus, if you’re not used to hard manual labour, you may end up with a very sore arm!
A circular saw (which can be bought from any good DIY store for upwards of £50) is probably the most popular tool for cutting worktops. With a rotating blade, this handheld tool will make light work of any cuts.
If you’d like to make more precise, cleaner cuts, a router saw may be more suitable. Again, this can be purchased for anywhere upwards from £50. A plunge saw is also an option, although this may be more suited to those who have professional experience in cutting worktops.
It may be a good idea to have access to both a circular saw for initial cuts and a router saw for more precise cuts. We discuss the pros and cons of such saws in the FAQ section below.
Of course, at this stage it is very important to point out that such saws can be very dangerous in inexperienced hands and you should always wear recommended safety equipment when using them.

Step 3—Prepare the worktop
One important thing you’ll need to do when cutting your worktop is find a suitable place to do this. If the weather is fine, you could set up a workbench in a garden or outside area. However, if the great British weather strikes, a garage or other indoor space with plenty of clearance space may be more suitable. Make sure both ends of your worktop are fully supported or, when cutting, it may snap rather divide cleanly.
If you are using a circular saw, turn your worktop upside down, so the laminate surface is facing the floor and have the front edge of the worktop (the visible edge) facing you. Circular saws cut in an upwards motion, so should make a clean cut straight through the surface and produce rougher exit cuts through the chipboard surface—the bit which won’t be visible once installed. It is worth using another straight edge as a guide.
Clamp the worktop (and straight edge guide) to your workbench to ensure it doesn’t move.
Step 4—Make the cut
If using a circular saw, set the blade depth to 0, position against your straight edge guide and move the saw in a clean motion from front to back. Repeat this, cutting deeper each time until you saw fully through the worktop.
If you are making more precise cuts using a router, many of the same principles apply. Ensure your blade is set to the correct depth, then move smoothly along the line of the cut. The router saw should move easily through the worktop material.
Step 5—position your worktops
The worktops can now be placed on top of the cabinets below and moved into position—more than often, this will require 2 people, to ensure the job is completed safely and without causing any damage. Check to ensure no further cuts are needed. For further steps, why not read our guide to joining worktops.
How to measure a kitchen worktop
Before you buy your new kitchen worktops, you will need to know exactly which size and quantity to orders. If you’re replacing like for like, it should be a simple process of measuring all the existing worktop surfaces in your kitchen. Here’s how to do this in 3 easy steps:
-
Measure the full length of each work top side in millimetres, adding them together to create a single total (for example, if you have 3 worktops around the perimeter of your kitchen, measure the length of each against the wall and add together to get a total).
-
Take note of the width from the wall to the worktop edges hanging over the cabinets below.
-
Don’t forget to include any “cut outs” in your current worktop, where sinks or hobs are typically situated. These will need to be cut out of your new worktops.
If you have any plans to extend your worktop, be sure to include the measurements for this too.

Cutting worktops FAQs
Below, you’ll find answers to some of your most frequently asked questions when it comes to cutting kitchen worktops.
How can I cut my kitchen worktop without chipping it?
A good way to prevent your kitchen worktop from being chipped is to use masking tape on the surface while you are cutting. Another recommended method would be to saw from the underside of the counter, as the teeth on the saw only cut into the material as it moves upwards. By using either of these methods, you’ll have a much better chance of avoiding any chips occurring as you cut through.
What is the best tool to cut a laminate worktop?
A circular saw is often the best option to cut laminate worktops. Make sure the blade is sharp (replace the blade if you have been using it for a while) and suitable for fine cuts—it should cut through the worktop without any issue. This is because laminate worktops contain a composite wooden particle chipboard core beneath the decorative wrapping.
If using a circular saw isn’t an option, there are some other tools you can use to cut the worktop. Some people choose a plunge saw, although they can be expensive to buy. A plunge saw will cut through the surface easily, making short work of the job—although using a plunge saw may be more suited to experienced DIYers.
Another good power tool option is the router saw. When using a router, you will have to include markings for the clamp guide, overhang cut (if being placed over cabinets) and where the edges of the unit will be. Router saws are a common type of power tool used for worktop cutting, although, as with plunge saws, they may require a more experienced hand to guide them. If you don’t own any power tools, you can cut your countertop with a handsaw, although it will require a lot more precision and effort to cut, especially when compared to an electric saw.
What tool do you use to cut countertops?
A countertop can be cut in the same way as a laminate worktop. However, some people prefer to use other power tools to cut through the material and a jigsaw can also be used if needed. This may be more suitable for solid wood worktops in oak kitchens, as using a circular saw in this instance would require a lot more work, while a jigsaw can cut through a lot more accurately and quickly.

Helpful tips for cutting a kitchen worktop
Worktop cutting requires good preparation and a steady hand to create a good cut. Below are some helpful tips to ensure your finished worktop looks fantastic.
Getting a straight cut
Once you have measured and marked out where the cuts will be, use clamps to hold down a straight edge that is level with the cut line. As you cut through the material, you can use this as a guide rail to keep the teeth straight.
How to get a better cut
Another way to improve the cut is to ensure that both sides and the full length of the worktop are supported as you move through it. This also applies to cut off sections, which should be supported, to ensure you don’t damage the worktop. A simple way to do this is to use saw benches and/or have another person hold the worktop in place as you cut through.
Use additional support
To support the worktop, place an MDF sheet (at least an inch thick) beneath the worktop and also cut into it by a few millimetres as you saw. This will mean the full surface area of the worktop is supported as you cut, which will also reduce the likelihood of damage as a result of snaps or strains before you have finished.
Manage the pressure levels
Before the saw blade touches the work surface, start the circular saw and slowly apply a forward pressure as it comes into contact. By doing this, you allow the saw to do all the hard work as it slices through the worktop, using a controlled speed from one side to the other.
Avoid exit damage
To avoid causing any damage as you pull the saw back out of the worktop surface, take care to saw from the rounded edges at the front to the back of the worktop. By making sure the blade exits the surface on the far edge of the worktop, you will achieve a better finish. It also means that the wall will hide any burrs (rough edges) that may be visible on the other side of the worktop.
Use off-cuts for practice
Making a good cut comes down to practice and experience, so it’s a good idea to take a section from your old worktop to practise on. This will enable you to build up some confidence and avoid making mistakes on the actual kitchen worktop you are installing. The more you practise, the better chance you have of getting a nice, clean cut when you start on the real thing.
One last thing
The most important thing to remember is that even if you don’t make the perfect cut, there are still ways to make your finished worktop look good, even if it means using a metal strip or filler. And there’s always the option of hiring a professional installer, which should ensure your worktops are cut and installed to a high standard.
More kitchen DIY advice
If you’re attempting to fit a kitchen yourself, you may wish to read our guide to joining kitchen worktops, for a neat and seamless finish. Perhaps you’ve decided to leave it to the professionals? If so, we’ll show you the latest kitchen installation costs and explain, in 10 easy steps, how to plan and design your kitchen. Head to our kitchens advice section to see all our articles.
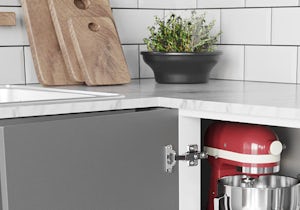
Shop kitchens
Whilst we’re better known for beautiful bathrooms, we’ve used our years of expertise to produce a comprehensive kitchen collection, containing quality kitchen worktops, cabinet ranges, stylish sinks, taps, heating and much more. Why not browse our full range by clicking on the image below.