Thinking of moving your bathroom layout around? We’ll show you how to place the toilet where the shower was.
Are you looking to revamp your bathroom with hopes of creating more space through reorganisation? This job is by no means easy, but for many homeowners, it’s certainly doable. It will however require a fair amount of remodelling to get this done, and you’ll likely be tearing down a wall or two and even bringing up sections of the floor and fixtures. If you’re already doing a full revamp of the toilet, this is the best and easiest time to change the bathroom layout.
It is important to read up on building regulations, especially with regards to plumbing. In some cases, the entire bathroom may need to be re-piped to accommodate the difference in sewage management (wastewater from showers and toilets are different, and often go to separate places). A new pipe and new toilet drain may be needed and you may be able to work with the existing floor. As long as there is enough space for your bathroom essentials, you should be able to work out any important considerations. Sinks, floors and features like the exterior wall also should be taken into account when it comes to bathroom layout.
If you’re planning on changing things in a pre-existing bathroom that is not undergoing extensive remodelling, be prepared for it to be labour-intensive. It is highly recommended that you are knowledgeable about plumbing, the drain line, shower pan and an existing pipe or have someone who can help.

Equipment and materials
You will need quite a few tools for this job. Most importantly, you must ensure that you have the proper protective equipment, such as goggles and gloves to protect exposed areas. Next, you will need some saws (a circular and reciprocating saw are popular options,) a drill with various ends, and a hammer to tear down some of the walls. Lastly, get yourself a pry bar and other miscellaneous equipment like screwdrivers and a wrench. You must determine how much length needs to be cut for the various areas of the bathroom, including the floor, toilet base and walls. Also consider fitting and fixtures for features such as a bathtub, flush, shower head and drain pipe.
For the materials, you will need some piping and fittings that are the appropriate size for your house and area, with three-inch-wide pipes being the most common in houses. You will need to get some pipe cement as well as some spaces. It is also advisable to get some cooling oil for your equipment, as well as some silicone sealant and abs glue. The drain pipe or vertical pipe should be correctly sized for your new toilet location. Things like a sink may be standard size.
Tear it down
We need to first remove the shower, which would require us to break into and remove the partition wall around the shower. Remember to take the showerhead and water outlets out (taking note of which pipe goes where), taking down the plasterboard so that we can get to the plumbing within.
Next, we need to take out the shower walls and shower tray which leads to the drain and drain flange. Start on the plumbing wall first, then move on to the other walls and work on the tray last. Doing it this way means that you can put plasterboard back on the non-plumbing walls after the tray has been removed without much issue. Bare in mind the existing cold water line.
Being careful of any electricals within the wall, use your hammer of choice along with a pry bar and remove the drywall. At this point, it is strongly advised to wear your protective equipment, particularly your goggles, to protect your eyes from flying shards of plaster and dust.
Next, ensure that no water is entering the pipes in the room. The water stop valves are often in the kitchen or airing cupboards. After making sure that there isn’t a water supply to the bathroom, use some caps to cover the stub-out pipes of your showerhead and water outlets. At this point, ensure that the cap head on the pipes does not protrude further than the wall studs, as we need to make sure the plasterboard sits flush when we reinstall it.

Hooking the toilet up
Toilets need to be supplied with water, so placing yours where the shower was means that’s easy to do.
Grab some PEX pipe and connect it to the cold water supply, and pipe it to where the toilet will now be placed. The pipes will run between the wall, and finish it off with a turn valve. If you are unable to connect the toilet up to the shower’s old cold water supply, you can alternatively run the toilet cold water supply to the new location, which does take more work as it needs additional support and more piping. Take note of the toilet supply line and toilet drain, alongside the main drain.
If you’re unable to make use of any of the existing water connections, you can also choose to add a new water supply to the room. This can be done by adding a T-connector to the pipes and running the pipes to where the toilet is. Similarly, ensure that there are caps and a connector at the appropriate sections.
New toilet drain
Unfortunately, toilet drains are normally 100mm or 4 inches, which would mean that a shower drain waste (which is smaller) will need to be replaced. Should you have a 100mm waste, however, you’re good to go and this step can be skipped.
First, we need to remove the original waste pipe from the location in the shower, cutting with a reciprocating saw at the main waste stack. Use the cut off piece of pipe to measure how long your new 100mm pipe will have to be. Then, install a new wye fixture in the stack and install a 3 inch long sweep 90-degree bend to the Y fitting. We need to then put in the new 100mm waste pipe from the new toilet location to the waste stack, making sure it connects to the long sweep 90-degree bend. When piping it up, the drainpipe has to be at a quarter-inch slope per horizontal foot toward the stack. It should be attached to a 90-degree bend at the top of the drainpipe and a 6 inch length of ABS pipe from the bend to the flooring.

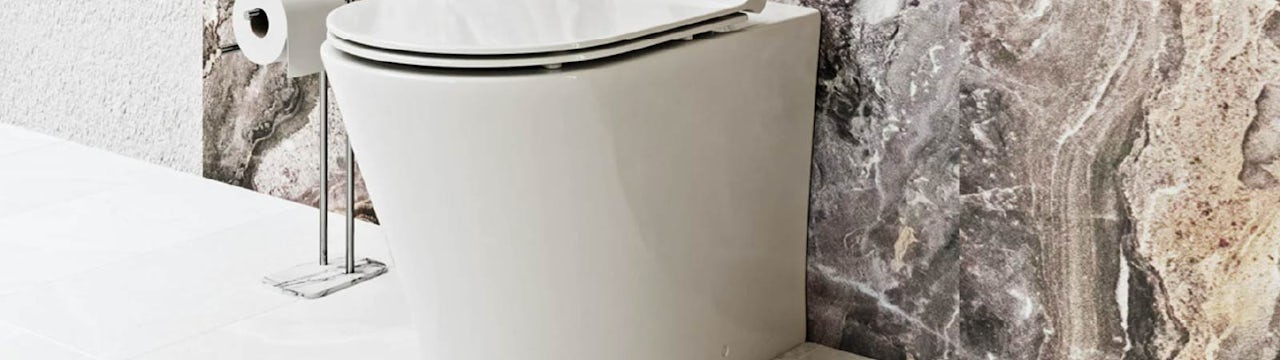
Putting in the toilet
After fixing your wall back up and putting it in the closet flange, it is time to put your toilet in. To do this, we will need to install a new wax ring, which will be placed on the closet flange and the toilet above it. The idea is that the toilet will compact the wax, which is soft, into a water-tight seal between the flange and the toilet.
There are a few kinds of toilet wax rings, ranging from normal wax rings to extra-thick, rings with sleeves and even plastic extensions. Take the time to research which option is best for you, as they all offer different levels of durability and longevity. Different bathrooms require different considerations.
Once your toilet is in place, tighten the bolts to secure the toilet, flange and floors whilst making sure that the holes are all in alignment. Once it has been secured down, attach a PEX pipe to the toilet tank, turn on the water supply to the room and check for any leaks in the system.

Conclusion
There are quite a few steps to do when you are swapping the toilet and shower locations. Make sure that you always check the lengths of your pipes and the building regulations on how your wastewater pipes need to be managed. With a bit of elbow grease and research, this swap can be easy to do, particularly if you’re redoing the bathroom and space already.


