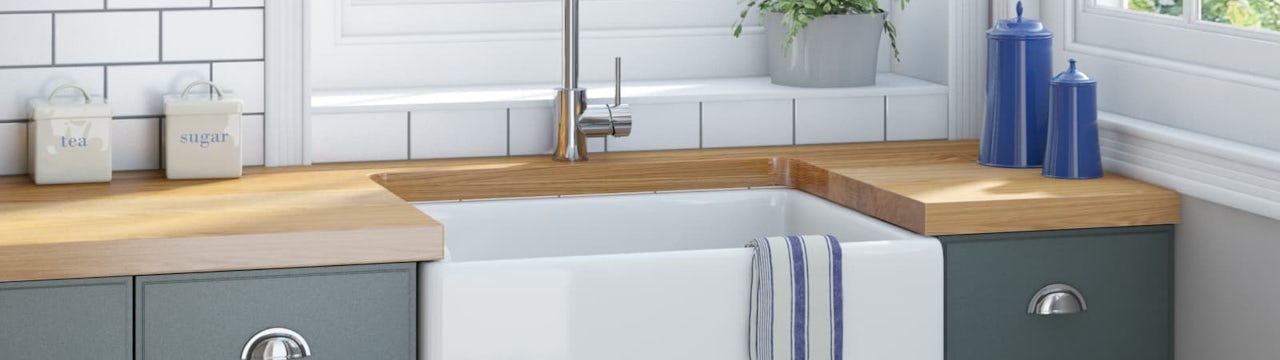
Whether you’re looking to save money on your new kitchen installation or simply updating your existing set-up, we’ll show you how to fit a new kitchen sink with our step-by-step guide.
There are many kitchen sinks available for all tastes and budgets. However, they are difficult to install for people who don't have experience with this type of DIY project, especially if you have to remove an old sink first.
You can flip through the table of contents on a manufacturer's website all you want, but you're going to need actionable steps if you plan on fitting a kitchen sink just right.
Do you need to know how to fit a kitchen sink? Whether you want to install a top mount or undermount sink, this article will set you in good stead and educate you about the types of sinks available and how to fit them.

How do I install a new kitchen sink?
Below is a step-by-step guide covering the process in detail. From waste pipe to drain pipe, no stone is left unturned. You'll be able to install a kitchen sink like an expert in no time.

Step 1: Turn off your water supply
First, make sure you turn off the water supply to the taps of the sink you're replacing. The hot and cold water pipes beneath the sink that supply the taps may have quarter-turn isolating valves, so turn the water off by moving the handle or nut on the valve until it reaches 90 degrees to the flow of the pipe.
You can tell the tap is on if it is in a parallel position. If there aren't any isolating valves on your sink, it would be an ideal time to fit them. You can purchase flexible hoses with these types of valves already fitted, but make sure you get the correct type for your specific tap.
It may be a good idea to turn off the water supply for the whole property—you don't want to be getting drenched later on.

Step 2: Close off the stopcock
If there aren't any isolator valves, you should turn off the cold water at the mains stopcock. There could also be another stopcock in the hot water system. You can close them by turning the handle clockwise. It is worth noting that your stopcocks may be hard to turn off as they aren't used regularly.
You can be sure the water is turned off by opening the tap on the kitchen sink. The water supply may still run for a couple of minutes, that's if you are emptying the expansion pipe—so be patient.

Step 3: Fit the overflow and the waste outlet
Now you can start building as much of the new kitchen sink and taps as you can before your old sink is removed. Fit both the overflow and the waste outlet with your specific instructions, and make sure all the seals provided are correctly applied. This makes sure the joints don't leak.
There are materials you can use to doubly ensure joints don't leak from things like water pressure. Wrapping PTFE tape around pipe threads will stop joints from leaking.
Step 4: Attach the supplied fixing clips
Before you can fit your new sink into your kitchen worktop, you need to attach the supplied fixing clips. This is how most sinks are held in position. For this step, you should follow your specific sink instructions.

Step 5: Insert the taps
If you're installing kitchen taps, now's the time to put them together according to your instructions. Before you can mount the tap to your new sink, you will need to attach the connection hoses.
These hoses come with light O ring seals that must only be tightened by hand. Refer to your assembly guide to double-check the requirements of your specific model.
Step 6: Remove the waste connection
Next is the removal of the waste connection (or even a waste disposal unit, if you have one). Have a bucket and a drain strainer on hand to catch any left-over water.
The plastic pipe connections now need to be unscrewed by hand. Remove the waste pipework that joins the waste assembly and leave it clear.

Step 7: Remove the tap(s)
Whether you intend to keep your current hot and cold tap(s) or replace for something shiny and new, you'll need to remove for this part of the guide. If you have a hose connection type tap, you'll need to disconnect the hot and cold hose nuts at the mains pipework.
If your pipes are directly connected, you'll need to unscrew the connecting nut from the tap thread. When removing your tap(s), be sure to take pictures as you go along so that you can refer back to them when fitting back on.
Step 8: Loosen clips
For the next fit kitchen sink step, you'll need to loosen the clips that keep the sink in place. The clips are situated right under the kitchen worktop — your plumber may advise you to lie on your back to complete this step. This makes it easier as you can see the sink clips while you're loosening them.
We'd also advise wearing some form of eye protection, as lying beneath the worktop could lead to materials falling into your eyes.

Step 9: Finally remove the old sink
This step in the guide depends on how your old sink was installed. You may need to carefully cut through the sealant with a sharp knife, ensuring you don't damage your countertop. Wear safety gloves and ask someone to help you lift your old sink from the worktop.
Step 10: Rinse off
Wash off any leftover sealant on your worktop and clean your countertop with an effective sink and kitchen cleaner.
Step 11: Made adjustments to the worktop
If you need to alter the size of your worktop to fit your new sink in, you can do so with a jigsaw fitted with a down-cut wood blade. Using this will stop the materials on your worktop from chipping.
If your kitchen sink units are made from chipboard, then all the exposed edges will need to be sealed with silicone caulk or other waterproof sealants to avoid water damage.
Step 12: Test the cut-out and measure
With a pair of gloves on, you can now test your new kitchen sink in the cut-out. Ensure that the waste pipes line up adequately, and if they don't, you'll need to cut them shorter or purchase a longer replacement.
Step 13: Place the sink in the cut-out
It will be easier to fit your taps once you have installed your kitchen sink. Once you're happy that the unit will fit, you can now go ahead and install the sink into the hole in the worktop.
Sink manufacturers usually provide an edging strip for installing between the worktop unit and the edge of the sink. This is to prevent water from running in the hole between the two.

Step 14: Tighten the sink retaining clips
Now you have your kitchen sink in position. You need to tighten the sink retaining clips. Again, it's easier to do this lying underneath the sink unit, as your visibility will be better. Don't forget to wear eye protection and use a head torch so you can see your tools and what you're doing perfectly.
Step 15: Insert the new taps
Now you can fit your tap(s) into your new sink. If you are installing new taps, then be sure to refer to your own instructions. If you are re-fitting your old ones, refer to your images when you disassembled them and reverse your steps.
Step 16: Turn your water supply back on
It's time to turn the water back on. Turn off your taps and place a bucket underneath your worktop. Be sure to place it under the open waste, and test for any leaks before reinstalling the waste pipework.
Use tools such as a wrench or spanner to ensure that every part of the joints is secured tight. Always start with the cold tap and only open the stopcock slightly as you check for leaks.

Step 17: Re-fit the waste pipes
After checking every site possible and confirming there are no leaks, you can begin re-fitting the waste pipes. Ensure all seals are correctly positioned and in good condition, and if you feel the seals may, in time, produce a hole, then we advise you to invest in some new seals.
Step 18: Clean the pipes
While you are at the bottom of the sink, we suggest you clean the P trap and any other pipes. Once you're done, you can get up from the bottom and re-fit the waste pipes.
Step 19: Inspect the area for leaks
Now you've turned the water back on, open each tap hole and check for leaks:
- Add the waste plugs
- Fill up the sink
- Release the water to apply the most waste pressure possible
You'll probably hear a gurgling noise coming from the tap, as there will be air in the system. Don't worry; the water flow will quickly return to normal.
Step 20: Put your pipes back together
If there is a leak in the waste pipes, undo each connection and check for damage to the seal. If it is out of place, tighten the joint back up, but be cautious not to over tighten it.
Frequently Asked Questions
How easy is it to move a kitchen sink?
If your sink drain is vented and the water can move freely, you can move sinks relatively easily. Before you begin the replacement, the hole underneath the sink must be completely clear, so you have access.
Do you need a plumber to install a kitchen sink?
You may not need a plumber's help for the whole process. However, there may be certain elements that you might need a professional for. For example, if you find your stopcock is too difficult to close on your own, it's best to contact them for their services.
If kitchen DIY is something you aren’t confident in attempting, we would thoroughly recommend hiring a plumber.
What factors should I consider before buying a new sink?
The most important factors are material and size. Whether you prefer porcelain, stainless steel, or cast iron, you don't want your sink to look out of place in your kitchen.
If your kitchen is small, opting for a large sink would look out of place, and vice versa. Ensuring your kitchen site has enough space for the size of sink you want is the most important. That's why we recommend following each step from our guide above and not skipping any precautions—you'll ensure the area is the correct size before fitting the sink.

Our final thoughts
Hopefully, this guide has helped you learn how to fit a kitchen sink in manageable steps. Your sink will be fitted so well that any visitors you have won't believe you completed the job yourself!
When it comes to replacing your kitchen sink, chances are you can probably use your existing waste outlet, inlet pipes, and water supply pipes. To make life even easier, try to choose a waste similar in size to the one you'll be removing.
When purchasing a sink, choose one similar in shape and dimensions to your current one. Correctly measure under the sink—you can go larger if you have enough space to cut a larger opening. Regarding the bowl, choose one as close to the same depth as your current sink unit.
More kitchen advice
Curious to learn more about sinks and installing appliances? Discover more handy help for your kitchen right here at Victoria Plum. We have plenty of practical step-by-step installation guides, buying guides and more to help you out.
Shop kitchen sinks
Whether you’re searching for a classic Belfast or Butler sink or perhaps something more designer, we have one of the widest ranges of kitchen sinks around, from leading brands like Rangemaster and Bristan. Simply click on the banner below to begin browsing.


