One of the best ways to add value to your property is to install a stylish wet room bathroom. In this blog post, we'll discover how it's done.
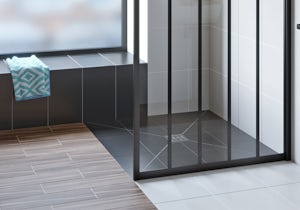
If you don't already know, a wet room is a fully waterproofed bathroom, offering level access showering and producing a clean, contemporary look. A shower tray with drain is normally incorporated into the floor and tiled over.
You may think a wet room is out of your price range, but we argue not. With our high quality wet room installation kits, made right here in the UK, you can create your very own wet room in just a matter of days, rather than weeks.

You don't need a huge space to create a stunning wet room like this
Below, you'll find a video and instructions on how to install one of our wet room kits, with shower tray and waterproof flooring, which will get you well on your way to creating a beautiful and fully-functioning wet room.
Before you do anything
Always unpack your wet room pack immediately after delivery. Check for any damage or faults as it’s better to find them now, rather than during installation.
Always turn off your water at the mains before attempting any DIY in the bathroom.
Tools you’ll need:
- Circular saw
- Electric drill
- Hard point saw
- Notched trowel
- Paint brushes
- Pencil
- Silicone sealant gun
- Spirit level
- Standard screwdrivers
- Tape measure
Check you have the following:
Supplied with wet room tray waste & installation kit:
- 2 x internal wall corners
- Fix-KST fixing adhesive
- PRO-Seal pre mix tape sealer
- Waterproof tape
- Wet room shower tray waste and trap
- Wood floor primer
See what's in the box:
Will need to buy separately:
- Silicone sealant
- Tiles
- Tile grout & adhesive
- Waterproof floor kit
- Wet room shower tray
- Wood battens
- Wood screws
- Shower & valve (if required)
- Glass panel(s) (if required)
Time to complete:
- 3–5 days (depending on the size of your room)
How much does it cost to install a wet room?
To find out the latest typical costs that a Tradesperson might charge to fit a wet room, check out our guide to bathroom installation costs.
Fitting your wet room shower tray and floor
At Victoria Plum, you’ll find our wet room shower tray kits are made from high quality materials for a 100% waterproof seal and anti-bacterial protection.
Please follow this video, with step-by-step instructions below:
The instructions below are for fitting your wet room shower tray, waste and flooring only.
Here's how to install a wet room
-
Measure the entire floor area and plan the layout of your new wet room on a piece of paper.
-
Decide now if any of the waterproof boards need to be cut and if they do, cut them now using a hard point saw. Lay the entire pack out across the floor area to check the fit.
-
Carefully remove the waterproof boards and store somewhere safe.
-
Mark the shower tray position onto the floor and position of the waste hole in the wet room shower tray.
-
Using the nails or screws holding the existing flooring down as a guide, establish where the joists are.
-
Mark the centre line of the first joist outside the shower area as you will need to remove the floor up to this line.
-
Carefully remove the wet room shower tray and store somewhere safe.
-
Set your circular saw blade to the depth of the floorboards. It may be necessary to increase the depth slightly if it doesn't go right through the floorboards.
-
Using the circular saw, cut along the lines you have marked and remove the flooring and all nails and screws.
-
Make sure that the remaining floorboards or sheets in the rest of the room are fully secured down and as level and flat as possible.
-
Spread solvent weld adhesive around the inside of the drain connector.
-
Push the shower drain base onto the shower drain connector with a twisting action.
-
Spread solvent weld adhesive around the inside of the opposite end of the shower drain connector and then slide onto the waste pipe with a twisting action.
-
Once the solvent weld has set, pour water down the drain to check that the waste isn't blocked and that there aren't any leaks.
Handy hint: Make sure all pipes and drainage parts are clean at all times using solvent waste pipe cleaner.
-
All exposed joists will now need a batten running along the inside of the joist to accommodate the new plywood low level floor.
-
Cut some timber batten (approximately 20mm x 50mm) to length and screw at approximately 150mm intervals to the inside of all joists 18mm below the top of the joists.
-
Cut some 18mm plywood to fit between the joists on top of the battens previously fitted.
-
Measure the shower drain base position on the plywood then mark and cut using a jigsaw, so that the drain base and connector will be exposed through the new floor.
-
If you are left with a gap between the wet room shower tray and the flooring, make use of any of the discarded floor boards to make up the gap.
-
Lay the wet room shower tray into position and check it lines up with the shower base. Remove the tray and store aside for the moment.
-
Paint the entire floor area (including the new plywood) with wood floor primer. Leave to dry for at least 30 minutes.
-
Spread Fix-KST adhesive onto the shower tray floor area and drag your notched adhesive trowel across the surface to leave just the right amount of adhesive on the floor.
-
Place the wet room shower tray into position and bed down into the adhesive. Check that the shower tray is level in both directions.
-
Place the internal bowl into the shower drain base, then lock the internal dome into position.
-
Apply a thin bead of silicone around the drain base top and the outer ring of the shower tray.
-
Screw the drain top securely then allow the silicone to cure.
-
Spread Fix-KST onto the floor area, then use your notched trowel to leave just the right amount of adhesive on the floor.
-
Place the first waterproof board into position and bed down onto the adhesive cement.
Handy hint: If the floor immediately outside of the shower area is likely to get wet, it is a good idea to angle the boards slightly so that the water will run towards the tray and drain.
-
Repeat for the remaining boards, mixing more Fix-KST as required. Leave to set for approximately 3 - 4 hours depending on room temperature.
-
Along all joints fit the fixing plates at approximately 300mm centres. Place the centre hole of the fixing plates directly over the join line and screw to the floor.
-
Place the waterproof internal corners into position then mark around them with a pencil.
-
Using Pro-SEAL pre-mix tape sealer and a paintbrush, apply a thin layer of adhesive slightly overlapping the pencil marks.
-
Place the internal corner firmly into the tape sealer, then apply a further thin layer of tape sealer over the top.
-
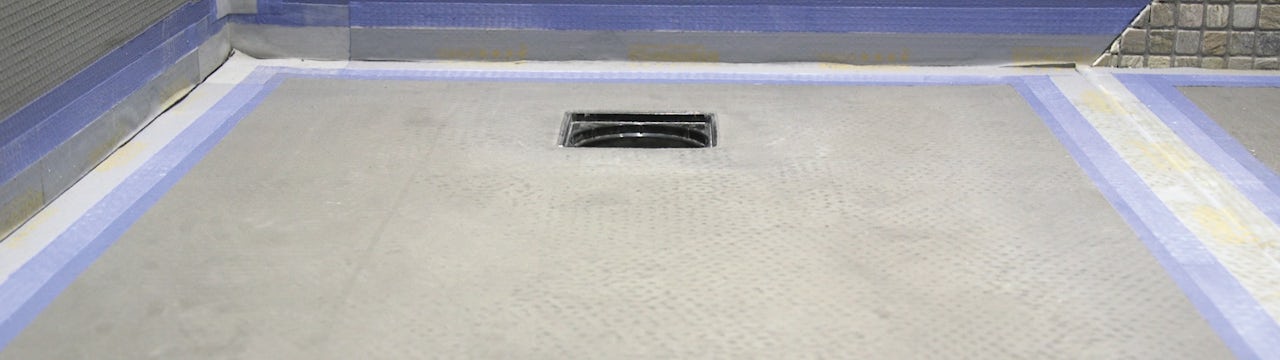
Apply a thin layer of Pro-SEAL tape sealer to one edge of the floor and adjoining wall approximately 60mm wide on each. Repeat for any remaining walls.
-
Apply a thin layer of Pro-SEAL tape sealer over all board joints and fixing plates.
-
Place the waterproof tape strips firmly into the tape sealer then apply a further thin layer of tape sealer over the top.
-
Place the shower drain top upside down and mark around it with a pencil.
-
Set aside the drain top then mark a line from each of the 4 corners of the square to each corresponding corner of the wet room shower tray. These lines act as tiling guidance for the tray falls and also the "tile up to point" for the shower drain top.
-
Finish the tray in your choice of tile using an S1 flexible cement-based tile adhesive.
-
If you are using tiles larger than 100mm, it is necessary to cut the tiles along the same lines previously marked, in order to maintain the slope.
-
Measure from the top of the finished tile to the top of the shower drain top.
-
Now mark the same distance as previously measured on the shower drain top.
-
Use a hard point saw to cut the excess from the bottom of the shower drain top.
-
Refit the O ring onto the lowest indent remaining on the shower drain top.
-
Ease the drain top into place, then fill the gap around the edges of the shower drain top and the start of the tile with the same grout you used on your tiles.
-
Place the shower drain finishing grate into position. Leave to dry for at least 24 hours before using your shower.
Congratulations, you've now fitted your new wet room shower tray, waste and flooring.
We would also recommend waterproofing your walls using our waterproof wall kit.
Whilst DIY can be a good way to save time and money, you should always hire a qualified professional to plumb and install your products. The instructions above are simply a guide to fitting a wet room and shouldn’t be used to attempt full plumbing and installation.
Great wet room ideas & advice
Click on any of the links below to discover more wet room inspiration and advice:
- 4 great wet room ideas
- Walk in shower enclosure and wet room ideas
- Make a real statement with a walk in shower or wetroom
- Small wet room? No worries...- Planning a wetroom
- Wetroom buying guide
- What is a wet room?
- Walk in showers v wet rooms: Which is right for you?
- 5 reasons why a wet room is a great bathroom option
- Walk-in bath, shower or wet room: What's the best option for your home?
Shop wet rooms at Victoria Plum
For a huge range of wet room solutions, including glass screens, shower trays, tiles and installation kits, browse our selection today by clicking on the image below.