Need some simple tips and tricks to spruce up your bathtub? You're in the right place...
Introduction
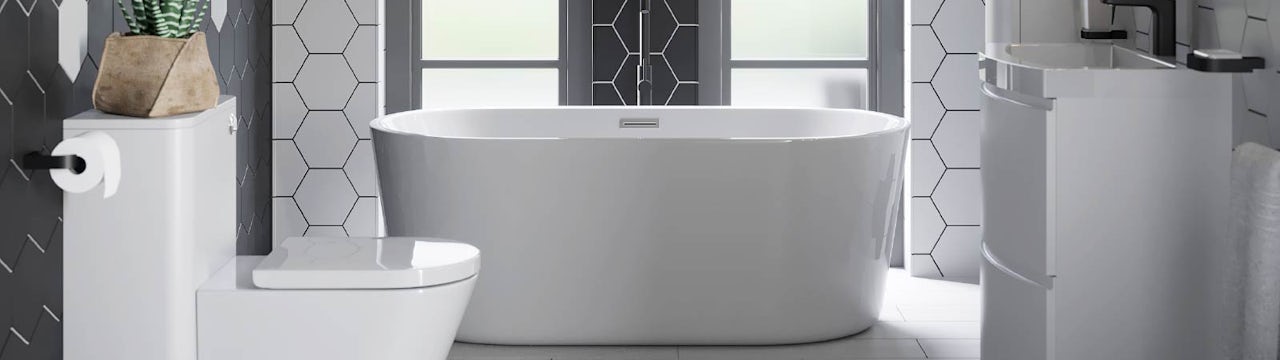
Your bathroom is a place that you use multiple times a day, so it only makes sense that you have a comfortable and pleasant experience whenever you use it. An old bathtub that is turning yellow or has stains around the entire body can stick out like a sore thumb. Not only is it a waste of space (if you don’t use it at all), an old bathtub can make the overall bathroom seem dull. Fret not. There are some simple tips and tricks you can try on your own to give your old bath, be it an acrylic tub or porcelain, a makeover.

Tips and tricks to make your old bathtub look new again
Before you spend a fortune to install a brand new bathtub, consider implementing one (or all) of the following tips that are about to be mentioned.
Baking soda
The obvious way to make your old and stained bathtub look new again is to clean it. Now, you’ve probably tried cleaning your bathtub a thousand times but does it seem like somehow the stubborn stain is there to stay for good?
Consistent cleaning is the ideal way to ensure that your bathtub stays sparkly clean. However, depending on the type of tub you own, your cleaning methods have to vary accordingly. If you find that the regular cleaning liquid and rag don’t work, perhaps you could implement the following cleaning hacks.
First, you want to mix a quarter cup of white vinegar with a litre of hot water and douse the surface of the tub.
Grab a handful of baking soda and toss it over the surface of the bathtub. Let it sit for about 30 minutes before scrubbing and rinse your tub clean. Baking soda should help to whiten your tub. Add a drop or two of your favourite essential oil to infuse your toilet with that lovely scent.
For stubborn stains, simply sprinkle some baking soda over them and use a sponge soaked in hot water to scrub them thoroughly. The stain should come right off. Be sure to not scrub the tub with tough bristles as it might damage the surface. Following this, you can also finish off with some dish soap and use a soft sponge to scrub off any soap scum residue.

Table salt and grapefruit
Another homemade stain remover is to sprinkle some table salt onto half a grapefruit and scrub that over the stained spots thoroughly. Not only can that get rid of the stains, but it also leaves a fruity aroma afterwards.
You can also mix baking soda with hydrogen peroxide to form a paste-like substance. Apply that to the stains and let it sit for 30 minutes. Rinse and wipe the spots clean afterwards.
To get rid of mould, fill a spray bottle with four tablespoons of bleach and hot water and spray the mixture directly on the mouldy areas. Let it sit for a few minutes before proceeding to rinse and wipe them clean. Put on a pair of protective gloves and open the windows and door for better air ventilation.

Restore your tub
While you can remove stains with the proper cleaning methods, permanent scratches or cracks cannot magically disappear. If your bathtub is clean but has many visible chips and cracks, you might want to consider doing some restorative work.
If your budget allows, hire a professional to do the work as it is their expertise after all. They can get the job done quickly and efficiently. If not, you can get hands-on and block out a weekend for a mini-project. Some options they may present include adding bathtub liner. Bathtub liners are great so protecting your tub against stains or damage.
Before you start applying anything, ensure that you have cleaned the tub once, preferably with one of the above-mentioned methods. Then, you’ll want to put up tarps or disposable plastic sheets against the surrounding walls and other bathroom commodities to keep them dry and clean. Leave the windows and doors opened to allow for better air circulation in the entire bathroom.
You can also bring in a fan to keep the sweat away. Uninstall any protruding faucets or handles so that it’s easier to restore the bath.
Purchase a DIY refinishing kit consisting of epoxy, cleaning solution, thinner, a brush, steel wool, and etching powder. Get ready with a pair of safety goggles, protective gloves, some lightweight sandpaper, and a paint roller. Now you’re fully equipped and ready to start.
First, sprinkle the etching powder across the surface of the tub and wash it off with water. Take the lightweight sandpaper and proceed to smoothen out the entire surface of the tub. Rinse, wipe, and dry the tub afterwards.

Next, apply a layer of primer with the paint roller and let it dry. Meanwhile, follow the instructions on the package to prepare the epoxy. When the first layer is dried, apply a second layer of the epoxy mixture with both horizontal and vertical motions. You’ll want to roll the mixture from one end to the other in one swift motion. For the tricky edges, use a sponge brush to apply the epoxy. Repeat this another time which means that your tub will be coated with one layer of primer and two layers of epoxy. Then, let your tub fully dry for 48 hours.
Lastly, you’ll want to replace the old caulk. Silicone caulk is a material used to fill the gaps between two things. If your bathtub is directly attached to the wall, chances are that there is a line of caulk used to join them together. Over time, due to the moisture of the bathroom and lack of ventilation, the caulk might start to turn yellow or even form mold.
No matter how clean your tub is, the sight of the dirty caulk can instantly make the bathtub seem dirty too. Use a utility knife to remove all the caulk. Make sure that there aren’t any remaining. Then, get a tube of store-bought fresh caulk and re-fill the gaps. Let that dry overnight and your bathtub should be looking brand new.
Conclusion
Do try out some of these tips. You might just be pleasantly surprised at the results. You can also do other things to freshen up the look of your bathroom such as changing the shower head or other accessories.
Freestanding baths: a growing trend
Why not browse our full range of freestanding baths today, to find your perfect design?


