A water-tight seal around your bathroom can prevent costly damages from leaks and spills. In our latest Easy Switches and Quick Fixes guide with video, we’ll show how to apply sealant for a neat finish.
Whether you’re fitting a bath, installing a shower enclosure or fitting a basin, you need to ensure each one is sealed correctly, to ensure water doesn’t find its way into gaps between the wall or floor and your installation.
Knowing how to correctly apply sealant is the first step to achieving this.
Whilst this may save you time and money, we would still firmly recommend hiring a professional tradesperson to plumb any items, such as a bath, shower, toilet or basin.
Tools you’ll need:
- Bathroom sealant (you’ll find both white and clear sealant at VictoriaPlum.com)
- Sealant gun for application
- Sharp blade
- Masking tape
- Sealant finishing tool (optional)
You’ll also need:
- Cloths to clean the area
- Protective gloves
Here’s how to apply sealant
- Ensure the area you wish to seal is clean, dry and free from dust and debris. If you are sealing a bath, make sure it is filled with water before you seal it. This will stop the sealant from pulling away when the bath is in use.

- Use the masking tape to mark the surface to be sealed. This will give a nice neat edge to the finished seal.

- Put on the protective gloves as some sealants can cause minor skin irritation.

- Take your blade and cut off the sealant tube cap, making sure to cut away from you. Then screw on the nozzle. Cut off the tip of the nozzle at a 45 degree angle, making sure the opening is slightly larger than the gap you are sealing.

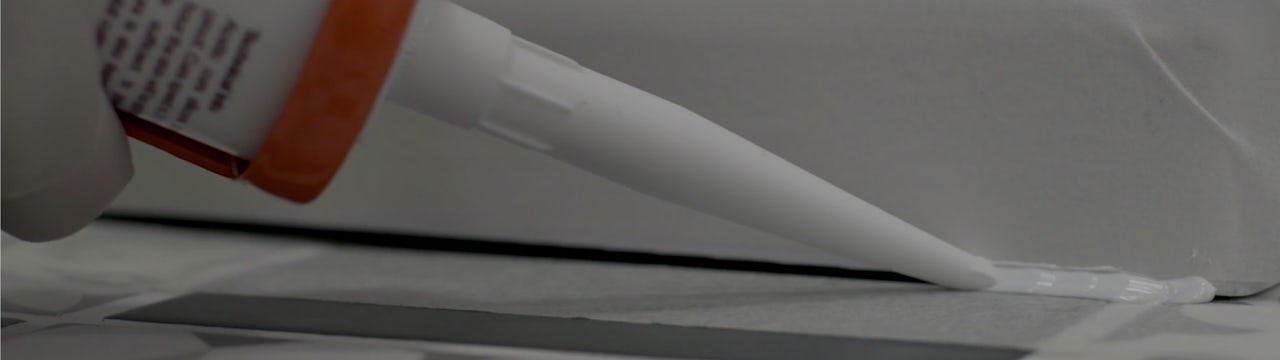
- Place the tube inside the sealant gun and squeeze the trigger gently. Take your time and leave behind a smooth, even line of sealant that completely covers the gap.

- To achieve a neat finish you can use a sealant finishing tool or alternatively run your finger along the length of the seal.

- Remove the masking tape taking care not to pull out any of the wet sealant.

- Make sure you allow plenty of time for the sealant to dry before emptying the bath of water or wetting the newly-sealed surface.

Congratulations, you have now applied your sealant.
We used the following products in this video:
- Bathroom sealant white and sealant gun
- Mode 8mm spacious walk in shower enclosure with tray and hinged return panel
- Mode Carter back to wall bath
- Patchwork pattern grey matt tile 142mm x 142mm
Shop sealant and tools
To ensure your installation is secure and long-lasting, browse our comprehensive range of high quality sealants today.
More Modern Fixes for your bathroom
With just a handy bit of advice and an easy-to-follow video, you can quickly and easily complete all those minor bathroom jobs, no matter whether you’re DIY enthusiast or a novice.
Head over to our Switches and Fixes hub to find out more, or click on any of the links below:


