An essential part of any basin installation, in this expert guide, we’ll show you how to fit a basin waste, complete with step-by-step instructions and handy video.
Whilst we would thoroughly recommend leaving the plumbing and installation of your bathroom to a qualified professional, you can save time and money by fitting your own basin waste.
Before you begin, you will need to find out which waste is right for your basin, using our guide.
Once, you have the correct waste, it’s time to install it.
Discover more installation instructions for other bathroom products by clicking on the links below:
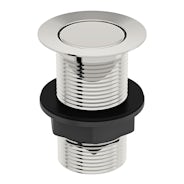
For the purposes of this guide, we’ll show you how to fit a slotted pop up basin waste, which is one of our most popular designs. The instructions can still be followed for many other, different types of waste.
If you are replacing an old waste and trap, find out how to replace a basin waste trap first.

Before you begin
Make sure you unpack and inspect your basin waste as soon as it’s delivered. In the rare event that your waste arrives damaged or faulty, it’s always best to find this out immediately rather than at the point of installation.
Always turn off your water at the mains before attempting any DIY in the bathroom.
Tools you’ll need:
Check you have the following:
Usually supplied with the waste:
- Hexagonal nut
- Washers
Will need to buy separately:
Time to complete:
10 minutes
Fitting your basin waste
At Victoria Plum, you’ll find our basin wastes are made from hardwearing brass and manufactured to the highest standards, for complete peace of mind.
The following video and instructions are for fitting a slotted pop up waste to a basin with an overflow.
Here is how to fit a basin waste
Step 1
Disassemble your waste ready for fitting.

Step 2
Apply a bead of silicone sealant around the opening of the plug hole to create a watertight seal inside your basin.

Step 3
Fit the waste into the hole, making sure any slots are pointed towards the overflow (if your waste and basin has these).

Step 4
Apply a second bead of silicone around the thread before adding a washer.

Step 5
Screw on the hexagonal nut and wipe away any excess silicone with a cloth.

Step 6
You can now fit your basin. Check out our basin fitting guide for step-by-step instructions and video.

Step 7
Now, refit the trap and check for any leaks.

Congratulations, you’ve now fitted your basin waste.
Find more expert bathroom advice
At Victoria Plum, you’ll find plenty of expert advice for bathroom installation, including expert buying guides, installation instructions, plus easy switches and quick fixes. Click on any of the links below to discover more.