Whilst many of the tasks involved with fitting your bathroom are best left to professional tradespeople, if you’re competent at DIY, you could save time and money by fitting your own wooden bath panels.
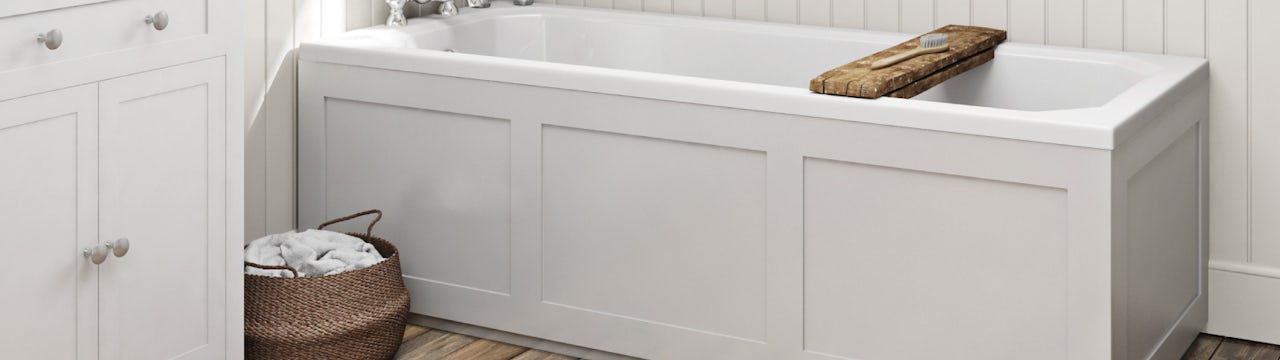
Wooden panels (most usually engineered wood or MDF bath panels) are a great choice, as they can be designed to blend seamlessly with the rest of your furniture. Your choice of bath and its position within your bathroom will ultimately dictate how many wooden panels you'll need. Most straight baths will require at least a front panel (the long panel that runs down one side), but you may also need to fit an end panel (the shorter panel that fits on one end).
You can find fitting instructions for other bathroom products by clicking the links below:
What is a wooden bath panel?
A wooden bath panel is commonly used with straight baths, to provide a neat finish and to hide the unsightly plumbing and underside of the bath itself.
Wood is sometimes preferred to other materials (e.g. acrylic) as it can give provide a range of beautiful finishes that fit in with your bathroom décor. For easy maintenance, engineered wood/MDF bath panels are common, usually with added moisture protection. Panels can be fitted to the side (front panel) and end (end panel) of the bath.

A straight bath with an Orchard Wye walnut wooden front panel (left) and end panel (right)
For a new bath, or to refresh your existing one, you can find the perfect solid bath panel in a range of styles and sizes on our website. Adjustable bath panels, with a plinth, will give you the best fit for your bath.
Before you do anything
Always unpack your solid bath panel immediately after delivery. Check for any damage or faults as it’s better to find them now, rather than during installation.
Always turn off your water at the mains before attempting any DIY in the bathroom.
Tools you’ll need:
- Electric drill
- Pencil
- Saw
- Sealant gun
- Standard screwdrivers
- Tape measure
Check you have the following:
Usually supplied with panel:
- Wooden plinth
Will need to buy separately:
- Brackets
- Length of 38 x 25mm wood batten—approximately 3.3m in length if fitting a side panel or 2.3m if fitting an end panel
- Silicone sealant
- Wood adhesive
- Wood screws
- Wood varnish or PVA mix (if panel or plinth requires trimming)
Typical time to complete:
- 30 mins
Fitting your wooden/MDF bath panel
First, watch our handy video before reading the step-by-step instructions below.
At Victoria Plum, you’ll find our wooden bath panels are crafted from high quality materials for a superb finish and durability.
Here's how to fit your wooden bath panels
Step 1

First, measure from the rim of the bath to the floor. This gives you the height your solid bath panel needs to be.
Step 2

Here we’re using a 2-part panel with a separate plinth. For this bath, we’ll be attaching both the front and end panels together to form one L shaped piece. We’re using a soft wood batten and brackets to connect our panels. The batten should be high enough up the panel to allow for the plinth.
Step 3

Once the main panels are joined, you’ll need to cut down the plinth. Any cuts that you make should be from the wall end of the plinth and you’ll also need to allow for any skirting boards or pipes.
Step 4

Any cut edges of your wood should be sealed with a PVA mixture or varnish to prevent water penetration.
Step 5

Offer up the panel to wall and once in the required position, mark the wall.
Step 6

Remove the panel and, using a piece of plinth, make a second mark. This is where the edge of your supporting batten will be placed.
Step 7

Attach the battens to the wall with screws.
Step 8

Apply some adhesive to the inside of each panel end where it will meet the batten fixed to the wall and slide the L shape into position.
Step 9

Fill the joins with a bead of silicone sealant to ensure a watertight finish.
Congratulations, you’ve now fitted your bath panels.
A final word...
Whilst fitting a bath panel can be a good way to save time and money, you should always hire a qualified professional to plumb and install your bathroom products.
More quick bathroom fixes
If you’re looking for more bathroom DIY advice, why not click on one of the links below?
- How to apply sealant
- How to fit a toilet seat
- How to change a shower head
- How to bleed a bathroom radiator
- How to clean a tap cartridge
Shop wooden/MDF bath panels at Victoria Plum
If you're searching for a bathroom panel store with a wide range of adjustable bath panels, sliding bath panels and more, all at low prices, why not browse Victoria Plum? From traditional to contemporary styles, we've a wide variety of solid bath panels to suit all bath sizes. Discover our beautiful bath panels today.


