Save time and cash and when installing your bathroom with this expert guide, showing you how to fit an acrylic bath panel in 7 easy steps.
Whilst we’d always recommend that you hire a professional tradesperson to plumb and install your new bathroom, you can save on your bathroom fitting costs by completing some of the simpler elements yourself.
Depending on the type of bath you have purchased and where you've positioned your bath, you may require 1, 2 or even 3 panels. Most straight baths require at least 1 front panel (the long, straight panel that runs down one side of the bath) and at least 1 end panel (the smaller panel that fits on the end). Certain baths, like corner baths, only require 1 specially-designed panel, and some baths, like freestanding baths, require no panels at all.
If you’re not sure which bath you have, check out our bath buying guide.
You can find fitting instructions for other related bathroom products by clicking the links below:
What is an acrylic bath panel?
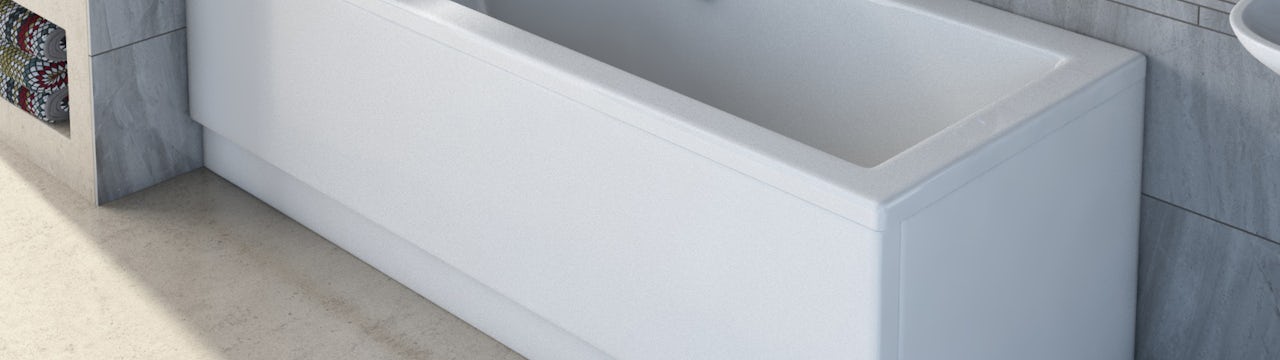
An acrylic bath panel is commonly used with straight baths, to hide the unsightly plumbing and underside of the bath itself. It also provides protection to the floor beneath the bath from splashes. Panels can be fitted to the side (front panel) and end (end panel) of the bath. The best bathrooms tend to have panels which fit with the rest of the decor (e.g. oak to match oak furniture).

A typical straight bath with front panel (on the left) and end panel (on the right)
If you’re looking to buy a new bath or simply wish to refresh your existing one, you’ll find the perfect acrylic bath panel in a range of sizes and styles at Victoria Plum.
Before you do anything
Always unpack your bath panel immediately after delivery. Check for any damage or faults as it’s better to find them now, rather than during installation.
Always turn off your water at the mains before attempting any DIY in the bathroom.
Tools you’ll need:
- Cable detector
- Electric drill
- Pencil
- Saw
- Spirit level
- Standard screwdrivers
- Tape measure
Will need to buy separately:
- A length of rebated timber (timber with a recess cut into it) or wooden batten with smaller wooden strip fixed to it, slightly shorter than the length (or width, if fitting an end panel) of your bath
- Wood screws
Time to complete:
- 30 mins
Fitting your acrylic bath panel
To fit your acrylic bath panel, first watch this handy video. You’ll find all the step-by-step instructions below.
At Victoria Plum, you’ll find our acrylic bath panels are crafted from high quality acrylic for a superb high gloss finish and durability.
Here is how to fit an acrylic bath panel
Step 1

Offer up the panel to the side of the bath. Make note of any skirting boards, pipes or uneven surfaces and then make the necessary adjustments to the panel.
Step 2

Place the panel back in position against the bath and, using a spirit level, check that the panel fits correctly.
Step 3

You will need a length of rebated* timber for each panel you are fitting. You can purchase this but a strip of timber fixed to a wooden batten will work just as well.
*Don't know what this term means? Look it up in our A-Z bathroom glossary
Step 4

Mark where the panel sits against the floor using your spirit level and line the timber up against these marks. The rebate should allow enough room for the bottom lip of the panel.
Step 5

Using this as a guide, make the necessary adjustment to the position of the batten.
Step 6

Using an electric drill, screw the timber batten to the floor. You may need to drill pilot holes in the surface beforehand. Make sure to always check for pipes and wires using a detector before drilling into existing surfaces.
Step 7

Place the panel lip under the rim of the bath, then slide the panel into place.
If you need to fit an end panel, simply repeat the previous steps to do this.
Congratulations, you’ve now fitted your acrylic bath panels.
A final word…
Whilst fitting a bath panel can be a good way to save time and money, you should always hire a qualified professional to plumb and install your products. The instructions above are simply a guide to fitting your new acrylic bath panels and shouldn’t be used to attempt full plumbing and installation.
More quick fixes for your bathroom
To save you money on all those minor bathroom repair and installation jobs, click on the links below.
- How to fit a toilet seat
- How to apply sealant
- How to clean a tap cartridge
- How to change a shower head
- How to bleed a bathroom radiator
Follow us on social media
For more great bathroom advice and ideas, follow us on social media by clicking any of the buttons below.


